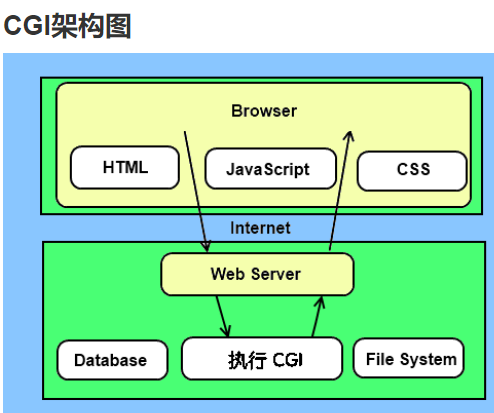
LNMP
安装nginx
安装mysql
mysql -uroot -p’As4k.top’ -e “select user,host from mysql.user”
第三方repo源 安装php
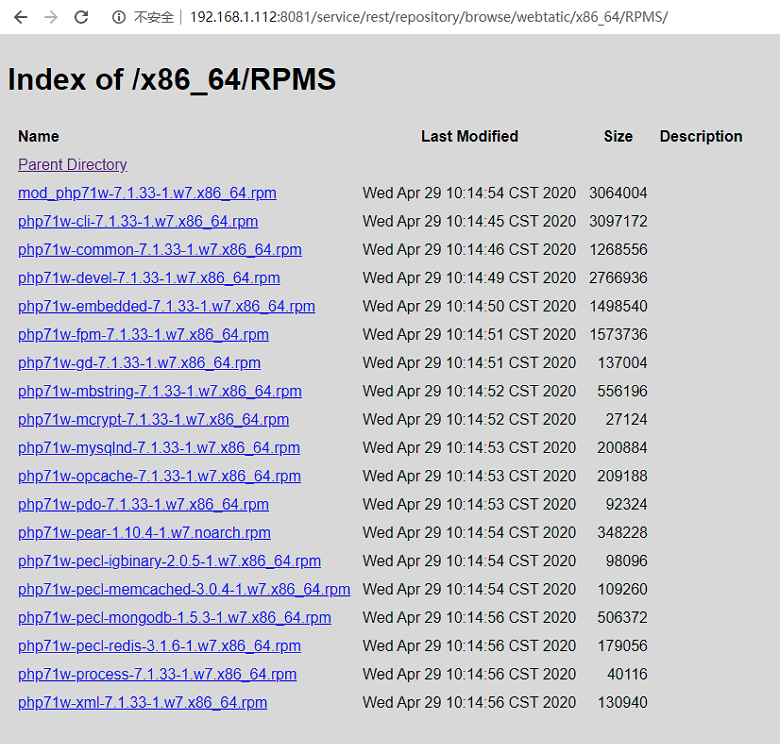
http://repo.webtatic.com/yum/el7/x86_64/RPMS/
yum install http://mirror.webtatic.com/yum/el7/webtatic-release.rpm
[root@node5 yum.repos.d]# ls -rlht
total 28K
-rw-r--r--  1 root root  963 Oct  9  2014 webtatic-testing.repo
-rw-r--r--  1 root root  865 Oct  9  2014 webtatic.repo
-rw-r--r--  1 root root  963 Oct  9  2014 webtatic-archive.repo
-rw-r--r--  1 root root 1.2K Sep 18  2019 epel-testing.repo
-rw-r--r--  1 root root 1.1K Sep 18  2019 epel.repo
-rw-r--r--. 1 root root 2.5K Oct 21  2019 Centos-7.repo
-rw-r--r--  1 root root  256 Oct 21  2019 epel-7.repo.gz

Repo-id      : webtatic/x86_64
Repo-name    : Webtatic Repository EL7 - x86_64
Repo-revision: 1580059522
Repo-updated : Mon Jan 27 01:25:31 2020
Repo-pkgs    : 683
Repo-size    : 331 M
Repo-mirrors : https://mirror.webtatic.com/yum/el7/x86_64/mirrorlist
Repo-baseurl : https://uk.repo.webtatic.com/yum/el7/x86_64/ (1 more)
Repo-expire  : 21,600 second(s) (last: Fri Apr 24 19:31:26 2020)
  Filter     : read-only:present
Repo-filename: /etc/yum.repos.d/webtatic.repo

repolist: 26,148


[root@node5 yum.repos.d]# cat /etc/yum.repos.d/webtatic.repo
[webtatic]
name=Webtatic Repository EL7 - $basearch
#baseurl=https://repo.webtatic.com/yum/el7/$basearch/
mirrorlist=https://mirror.webtatic.com/yum/el7/$basearch/mirrorlist
failovermethod=priority
enabled=1
gpgcheck=1
gpgkey=file:///etc/pki/rpm-gpg/RPM-GPG-KEY-webtatic-el7

[webtatic-debuginfo]
name=Webtatic Repository EL7 - $basearch - Debug
#baseurl=https://repo.webtatic.com/yum/el7/$basearch/debug/
mirrorlist=https://mirror.webtatic.com/yum/el7/$basearch/debug/mirrorlist
failovermethod=priority
enabled=0
gpgcheck=1
gpgkey=file:///etc/pki/rpm-gpg/RPM-GPG-KEY-webtatic-el7

[webtatic-source]
name=Webtatic Repository EL7 - $basearch - Source
#baseurl=https://repo.webtatic.com/yum/el7/SRPMS/
mirrorlist=https://mirror.webtatic.com/yum/el7/SRPMS/mirrorlist
failovermethod=priority
enabled=0
gpgcheck=1
gpgkey=file:///etc/pki/rpm-gpg/RPM-GPG-KEY-webtatic-el7


yum install php71w php71w-cli php71w-common php71w-devel \
php71w-embedded php71w-gd php71w-mcrypt php71w-mbstring \
php71w-pdo php71w-xml php71w-fpm php71w-mysqlnd php71w-opcache \
php71w-pecl-memcached php71w-pecl-redis php71w-pecl-mongodb -y


如果出现安装失败,尝试把webtatic源里的https替换为http

    # sed -i 's#https#http#g' /etc/yum.repos.d/webtatic.repo


[root@node5 yum.repos.d]# cat /etc/passwd | tail -3
chrony:x:998:996::/var/lib/chrony:/sbin/nologin
apache:x:48:48:Apache:/usr/share/httpd:/sbin/nologin
nginx:x:997:995:nginx user:/var/cache/nginx:/sbin/nologin
启动服务
systemctl start nginx
systemctl enable nginx

systemctl start php-fpm
systemctl enable php-fpm

systemctl start mysqld
systemctl enable mysqld

[root@node5 conf.d]# netstat -lntup | egrep 'nginx|php|mysql'
tcp        0      0 127.0.0.1:9000          0.0.0.0:*               LISTEN      11676/php-fpm: mast
tcp        0      0 0.0.0.0:80              0.0.0.0:*               LISTEN      11691/nginx: master
tcp6       0      0 :::3306                 :::*                    LISTEN      11617/mysqld
配置nginx连接php
1 编辑nginx配置文件
[root@web01 ~]# cat /etc/nginx/conf.d/test.as4k.conf
server {
    listen 80;
    server_name test.as4k.com;
    location / {
        root  /code/test;
        index index.php index.html;
    }

    location ~ \.php$ {
        root           /code/test;
        fastcgi_index  index.php;
        fastcgi_pass   127.0.0.1:9000;
        fastcgi_param  SCRIPT_FILENAME  $document_root$fastcgi_script_name;
        include        fastcgi_params;
    }
}
[root@web01 ~]# nginx -t
[root@web01 ~]# systemctl restart nginx
2 创建需要的文件
[root@web01 ~]# mkdir -p /code/test
[root@web01 ~]# echo "<?php phpinfo() ?>" > /code/test/index.php
3 启动php-fpm
[root@web01 ~]# systemctl restart php-fpm
4 配置hosts解析
C:\Windows\System32\drivers\etc\hosts
10.0.0.7 test.as4k.com
5 在浏览器中访问测试
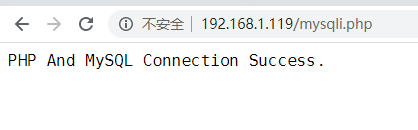
验证php是否能连接MySQL数据库
编辑测试代码

[root@web01 ~]# cat /code/test/mysqli.php
<?php
    $servername = "localhost";
    $username   = "root";     // mysql username
    $password   = "As4k.top"; // mysql password

    $conn = mysqli_connect($servername, $username, $password);

    if (!$conn) {
        die("Connection Failed: " . mysqli_connect_error());
    } else {
        echo "PHP And MySQL Connection Success.";
    }
?>

http://localhost/mysqli.php
部署 wordpress
# vim /etc/nginx/conf.d/wordpress.conf
server {
listen 8001;
server_name localhost;
root /code/wordpress;
index index.php index.html;
location ~ \.php$ {
fastcgi_pass 127.0.0.1:9000;
fastcgi_index index.php;
fastcgi_param SCRIPT_FILENAME $document_root$fastcgi_script_name;
include fastcgi_params;
}
}
# nginx -t
# systemctl reload nginx
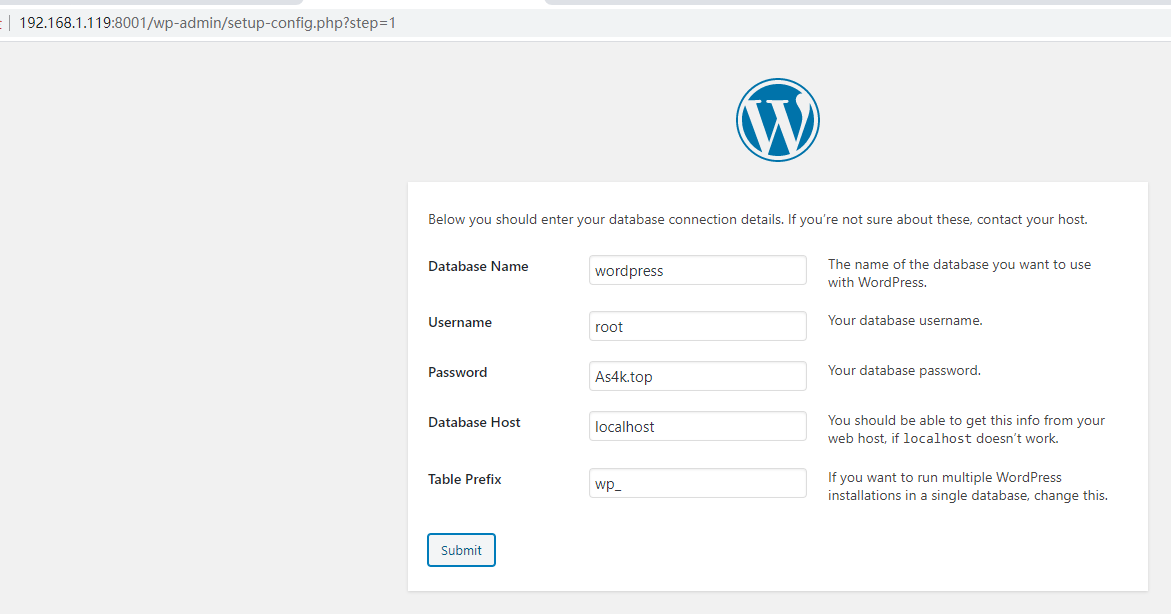
提前为wordpress创建一个数据库 有些软件无需提前创建数据库,wordpress是需要的
mysql -uroot -pAs4k.top -e "create database wordpress"
mysql -uroot -pAs4k.top -e "show databases"
cd /code
wget http://192.168.1.8/chfs/shared/linux-pkg/php/wordpress-5.4.tar.gz
tar xf wordpress-5.4.tar.gz
chmod -R 777 /code/wordpress
[root@node5 code]# ls /code/wordpress
index.php readme.html wp-admin wp-comments-post.php wp-content wp-includes wp-load.php wp-mail.php wp-signup.php xmlrpc.php
license.txt wp-activate.php wp-blog-header.php wp-config-sample.php wp-cron.php wp-links-opml.php wp-login.php wp-settings.php wp-trackback.php
访问浏览器 localhost:8001
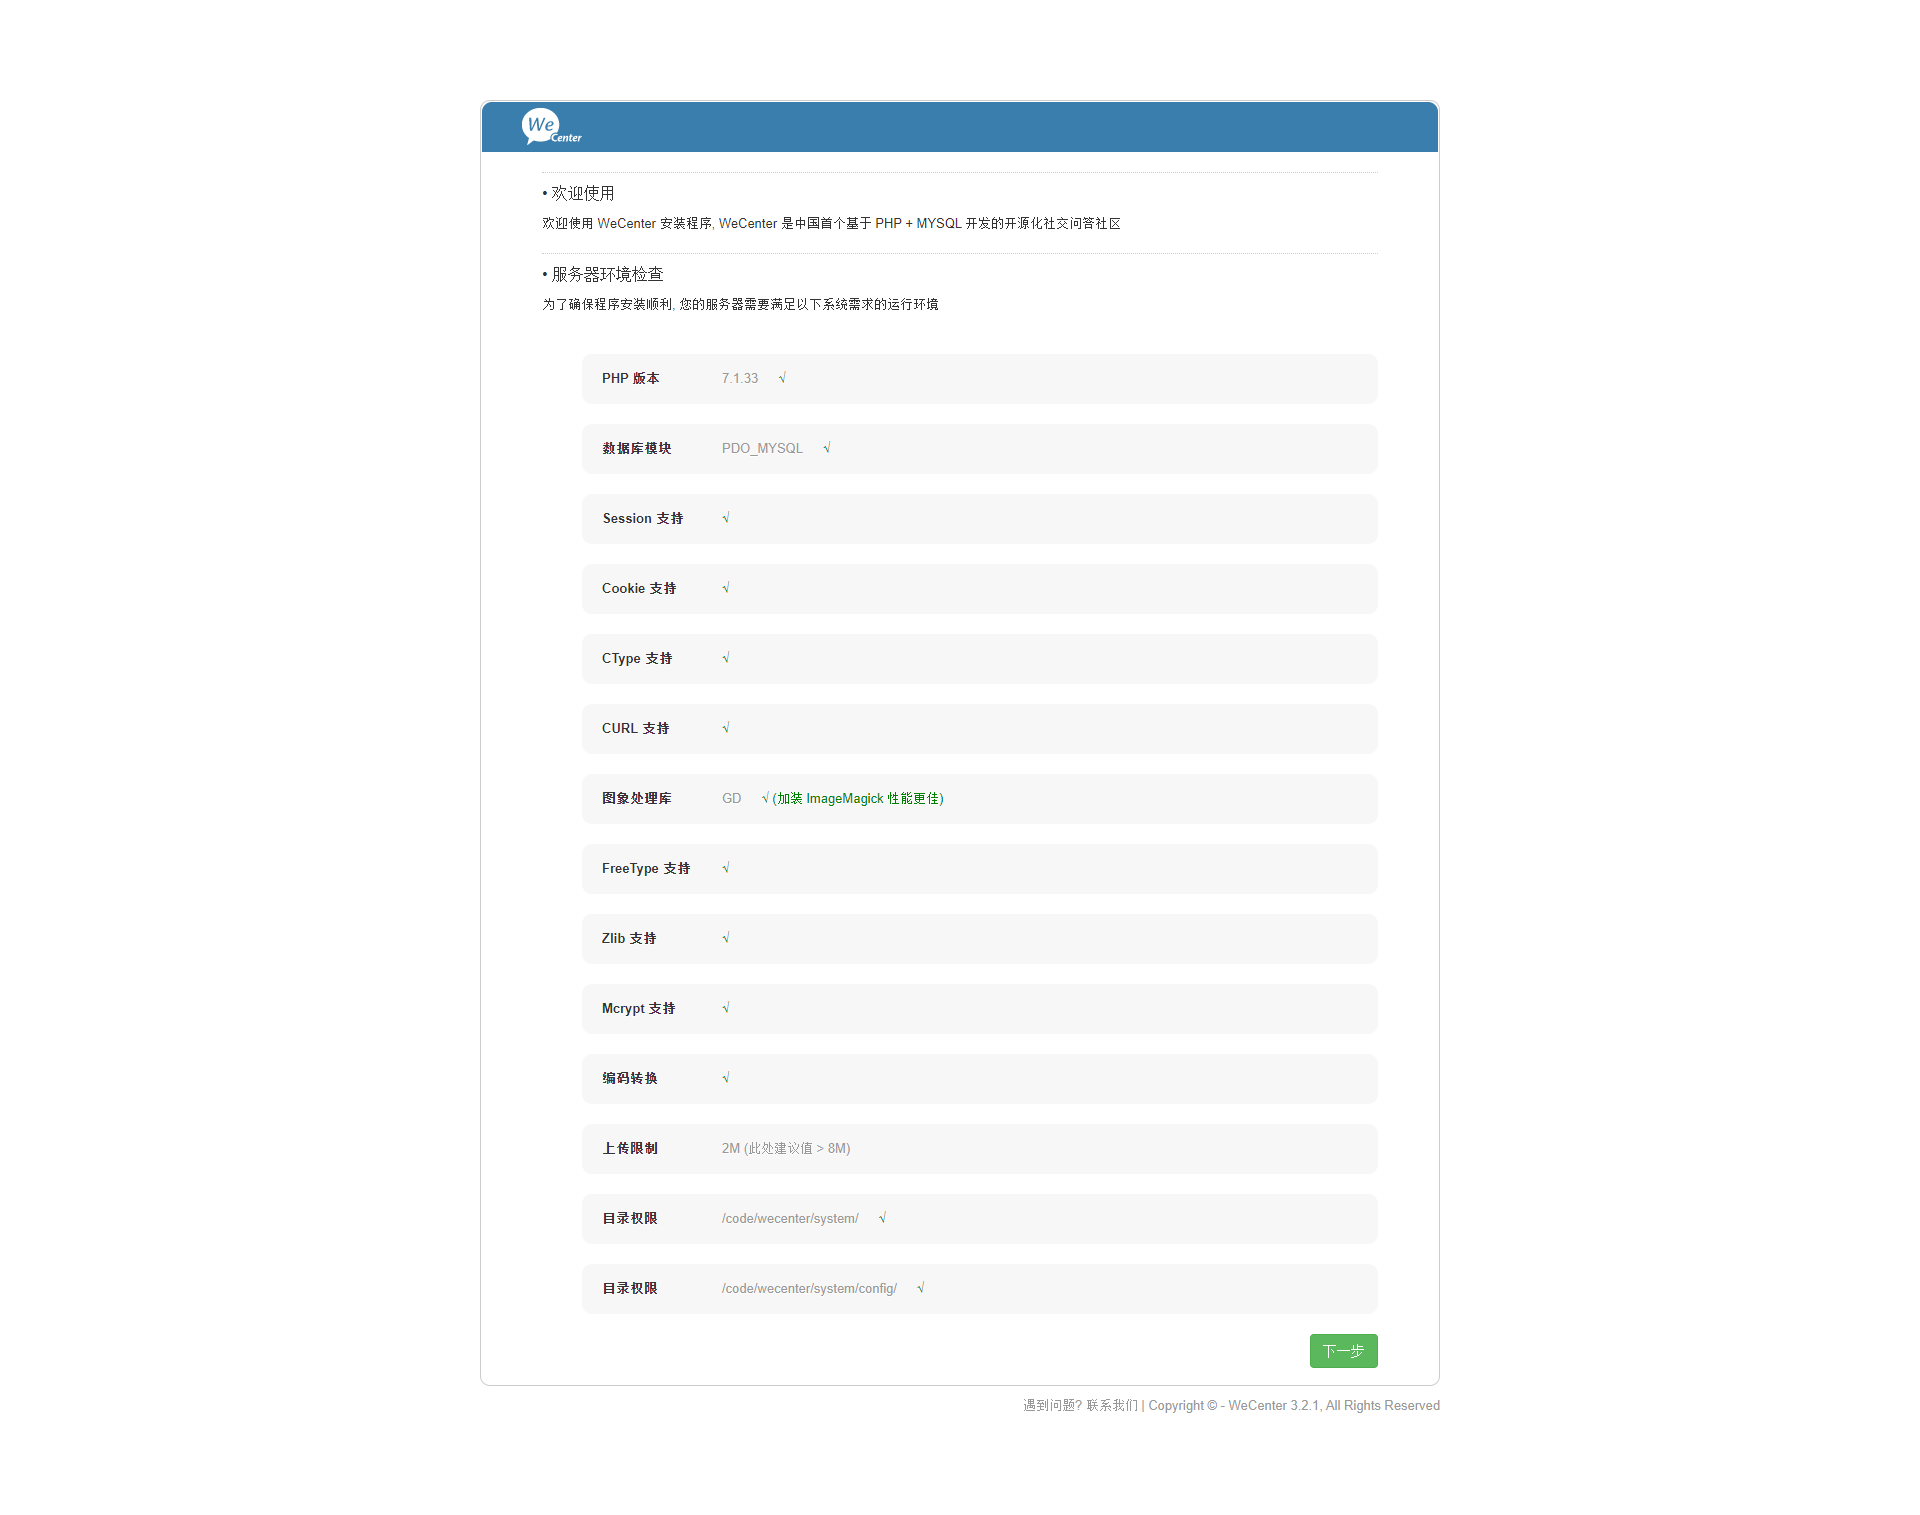
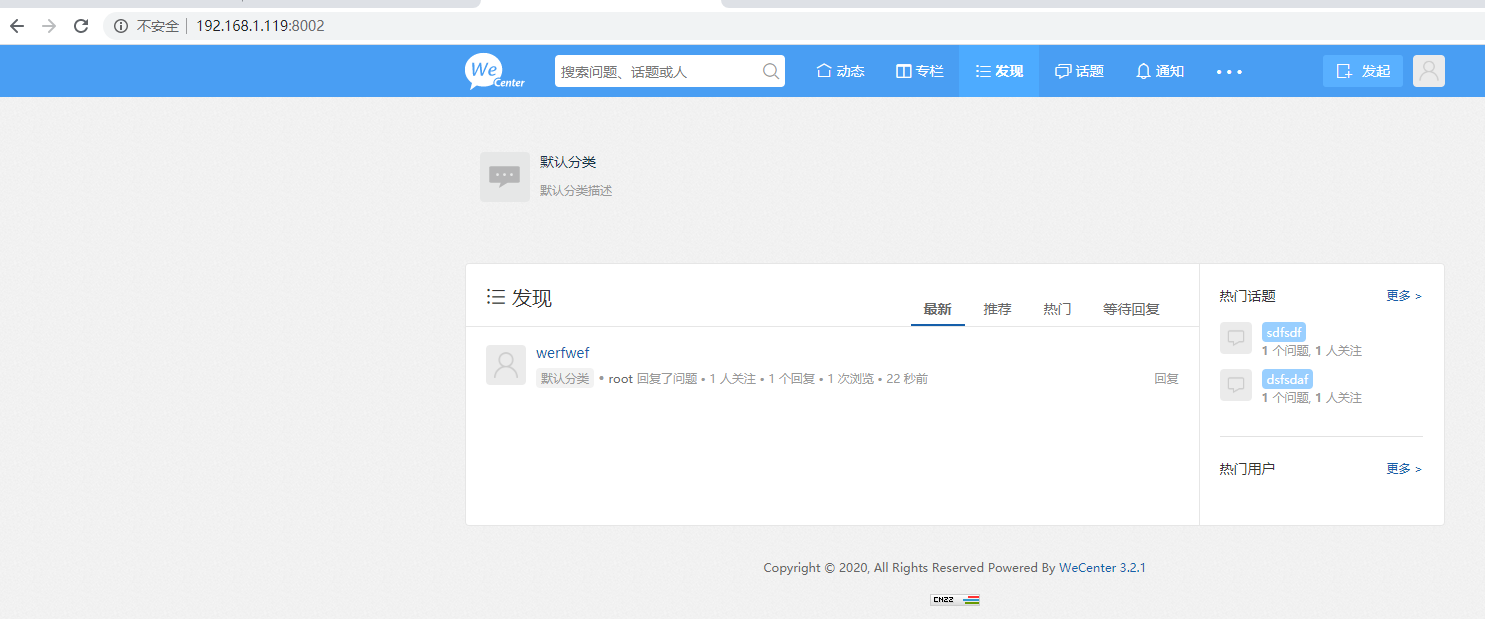
部署 wecenter
# vim /etc/nginx/conf.d/wecenter.conf
server {
    listen 8002;
    server_name localhost;
    root /code/wecenter;
    index index.php index.html;

    location ~ \.php$ {
        fastcgi_pass   127.0.0.1:9000;
        fastcgi_index  index.php;
        fastcgi_param  SCRIPT_FILENAME  $document_root$fastcgi_script_name;
        include        fastcgi_params;
    }
}
# nginx -t
# systemctl reload nginx

提前为 wecenter 创建一个数据库 有些软件无需提前创建数据库,wordpress是需要的
mysql -uroot -pAs4k.top -e "create database wecenter"
mysql -uroot -pAs4k.top -e "show databases"

cd /code
wget http://192.168.1.8/chfs/shared/linux-pkg/php/WeCenter_3-2-1.zip
unzip -q WeCenter_3-2-1.zip
mv WeCenter_3-2-1 wecenter
chmod -R 777 /code/wecenter

[root@node5 code]# ls /code/wecenter
api  app  cache  changelog.txt  index.php  install  language  license.txt  models  plugins  README.md  robots.txt  static  system  tmp  uploads  version.php  views

访问浏览器 localhost:8002
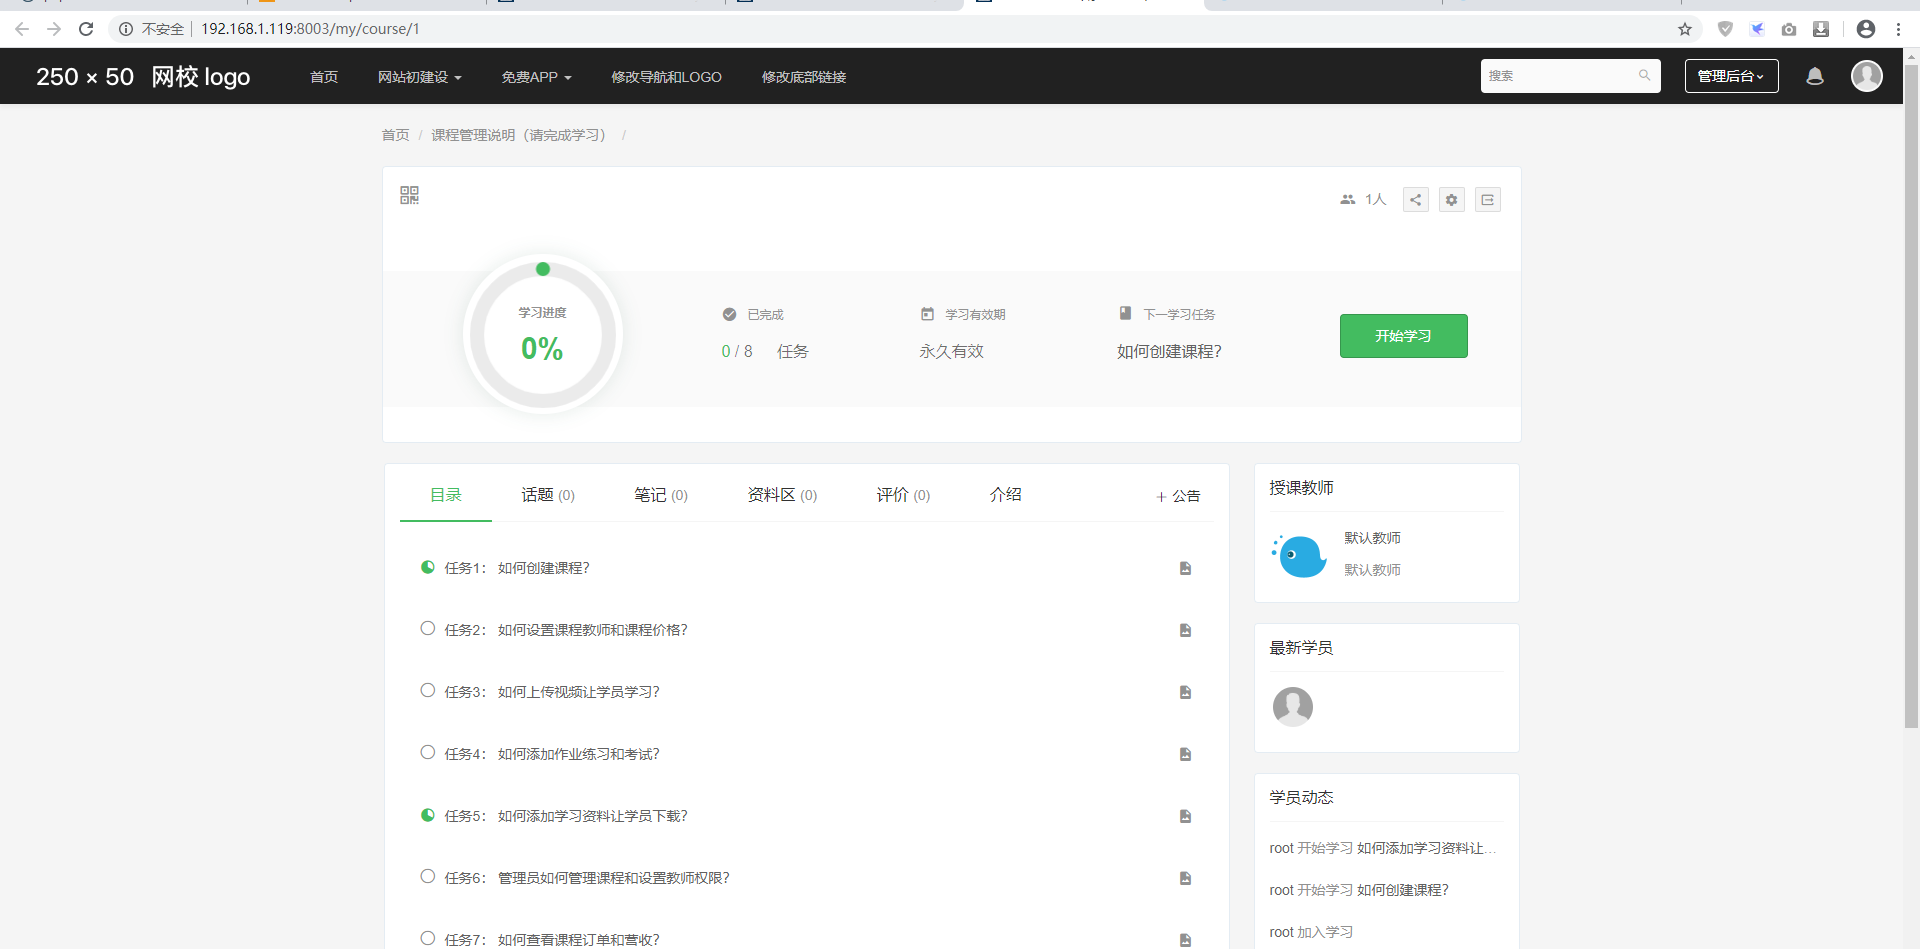
部署 edusohu
# vim /etc/nginx/conf.d/edusoho.conf
server {
    listen 8003;
    server_name edusoho.as4k.com;
    root /code/edusoho/web;

    location / {
        index app.php;
        try_files $uri @rewriteapp;
    }
    location @rewriteapp {
        rewrite ^(.*)$ /app.php/$1 last;
    }
    location ~ ^/udisk {
        internal;
        root /code/edusoho/app/data/;

    }
    location ~ ^/(app|app_dev)\.php(/|$) {
        fastcgi_pass             127.0.0.1:9000;
        fastcgi_split_path_info  ^(.+\.php)(/.*)$;
        include        fastcgi_params;
        fastcgi_param  SCRIPT_FILENAME    $document_root$fastcgi_script_name;
        fastcgi_param  HTTPS  off;
        fastcgi_param  HTTP_X-Sendfile-Type X-Accel-Redirect;
        fastcgi_param  HTTP_X-Accel-Mapping /udisk=/code/edu/app/data/udisk;
        fastcgi_buffer_size 128k;
        fastcgi_buffers     8 128k;
    }

    location ~ \.php$ {
        fastcgi_pass            127.0.0.1:9000;
        fastcgi_split_path_info ^(.+\.php)(/.*)$;
        include                 fastcgi_params;
        fastcgi_param  SCRIPT_FILENAME  $document_root$fastcgi_script_name;
        fastcgi_param  HTTPS  off;
    }
}
# nginx -t
# systemctl reload nginx


cd /code
wget http://192.168.1.8/chfs/shared/linux-pkg/php/edusoho-8.3.1.tar.gz
tar xf edusoho-8.3.1.tar.gz
chmod -R 777 /code/edusoho

[root@node5 code]# ls /code/edusoho
api  app  bootstrap  plugins  src  vendor  vendor_user  web

打开浏览器访问 localhost:8083

另一套配置参考
server {
    listen 80;

    # [改] 网站的域名
    server_name http://edusoho.as4k.com;

    #301跳转可以在nginx中配置

    # 程序的安装路径
    root /code/edusoho/web/;

    location / {
        index app.php;
        try_files $uri @rewriteapp;
    }

    location @rewriteapp {
        rewrite ^(.*)$ /app.php/$1 last;
    }

    location ~ ^/udisk {
        internal;
        root /code/edusoho/app/data/;
    }

    location ~ ^/(app|app_dev)\.php(/|$) {
        fastcgi_pass   127.0.0.1:9000;
        fastcgi_split_path_info ^(.+\.php)(/.*)$;
        include fastcgi_params;
        fastcgi_param  SCRIPT_FILENAME    $document_root$fastcgi_script_name;
        fastcgi_param  HTTPS              off;
        fastcgi_param HTTP_X-Sendfile-Type X-Accel-Redirect;
        fastcgi_param HTTP_X-Accel-Mapping /udisk=/var/www/edusoho/app/data/udisk;
        fastcgi_buffer_size 128k;
        fastcgi_buffers 8 128k;
    }

    # 配置设置图片格式文件
    location ~* \.(jpg|jpeg|gif|png|ico|swf)$ {
        # 过期时间为3年
        expires 3y;

        # 关闭日志记录
        access_log off;

        # 关闭gzip压缩,减少CPU消耗,因为图片的压缩率不高。
        gzip off;
    }

    # 配置css/js文件
    location ~* \.(css|js)$ {
        access_log off;
        expires 3y;
    }

    # 禁止用户上传目录下所有.php文件的访问,提高安全性
    location ~ ^/files/.*\.(php|php5)$ {
        deny all;
    }

    # 以下配置允许运行.php的程序,方便于其他第三方系统的集成。
    location ~ \.php$ {
        # [改] 请根据实际php-fpm运行的方式修改
        fastcgi_pass   127.0.0.1:9000;
        fastcgi_split_path_info ^(.+\.php)(/.*)$;
        include fastcgi_params;
        fastcgi_param  SCRIPT_FILENAME    $document_root$fastcgi_script_name;
        fastcgi_param  HTTPS              off;
    }
}
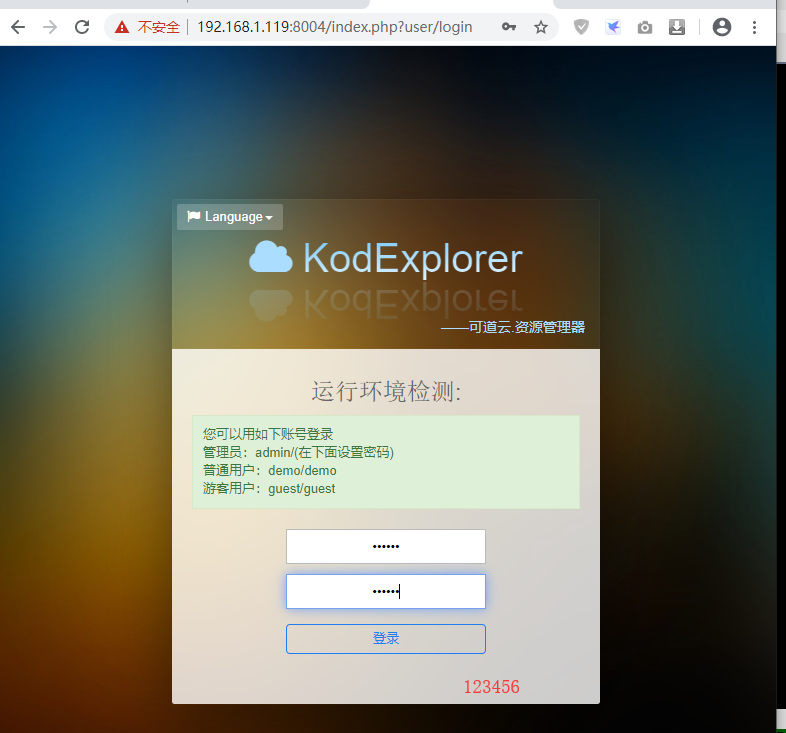
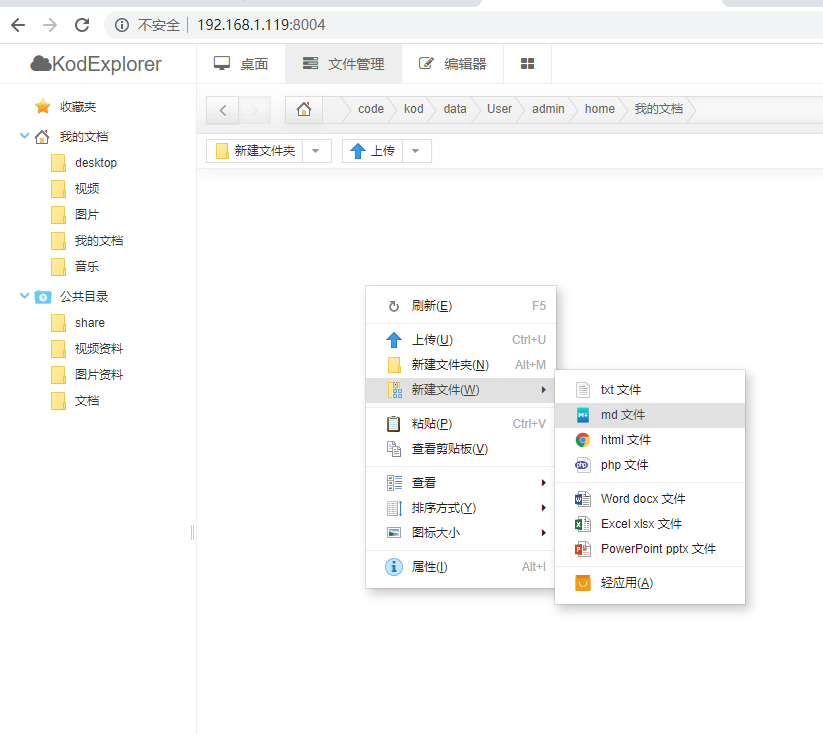
部署 可道云 KodExplorer
# vi /etc/nginx/conf.d/kod.conf
server {
    listen 8004;
    server_name localhost;
    root /code/kod;
    index index.php index.html;

    location ~ \.php$ {
        fastcgi_pass   127.0.0.1:9000;
        fastcgi_index  index.php;
        fastcgi_param  SCRIPT_FILENAME  $document_root$fastcgi_script_name;
        include        fastcgi_params;
    }
}
# nginx -t
# systemctl reload nginx

mkdir -p /code/kod && cd /code/kod
wget http://192.168.1.8/chfs/shared/linux-pkg/php/kodexplorer4.40.zip
OR http://static.kodcloud.com/update/download/kodexplorer4.40.zip
unzip -q kodexplorer4.40.zip
chmod -R 777 /code/kod

[root@node5 kod]# ls /code/kod
app  ChangeLog.md  config  data  index.php  kodexplorer4.40.zip  plugins  README.MD  static

访问浏览器 localhost:8004

参考kodexplorer安装资料 http://group.kodcloud.com/#s/5clWnwKA
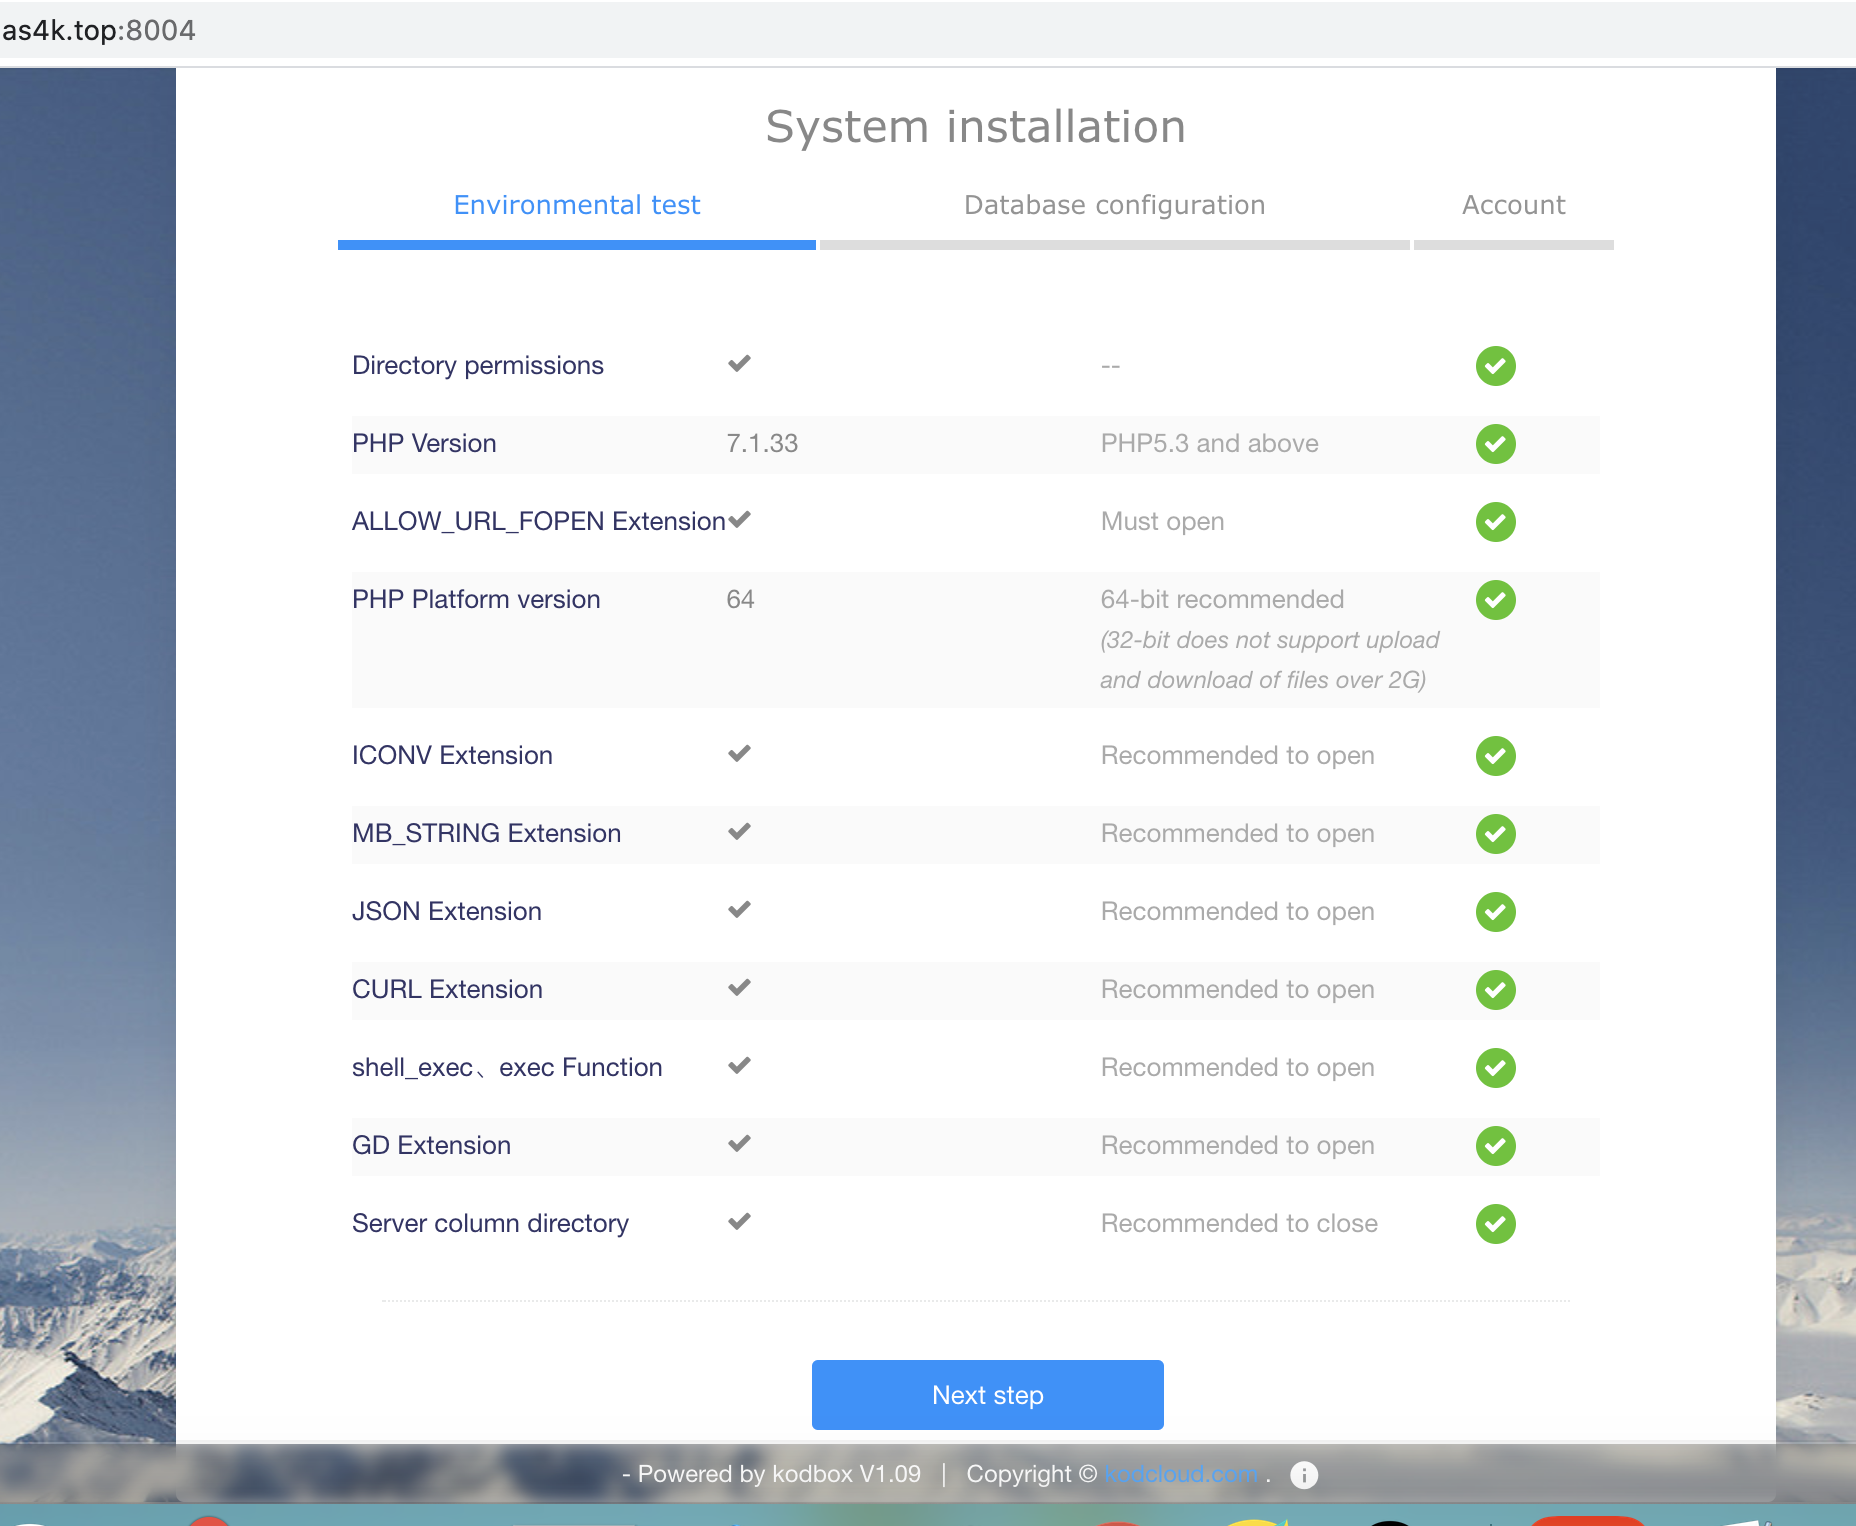
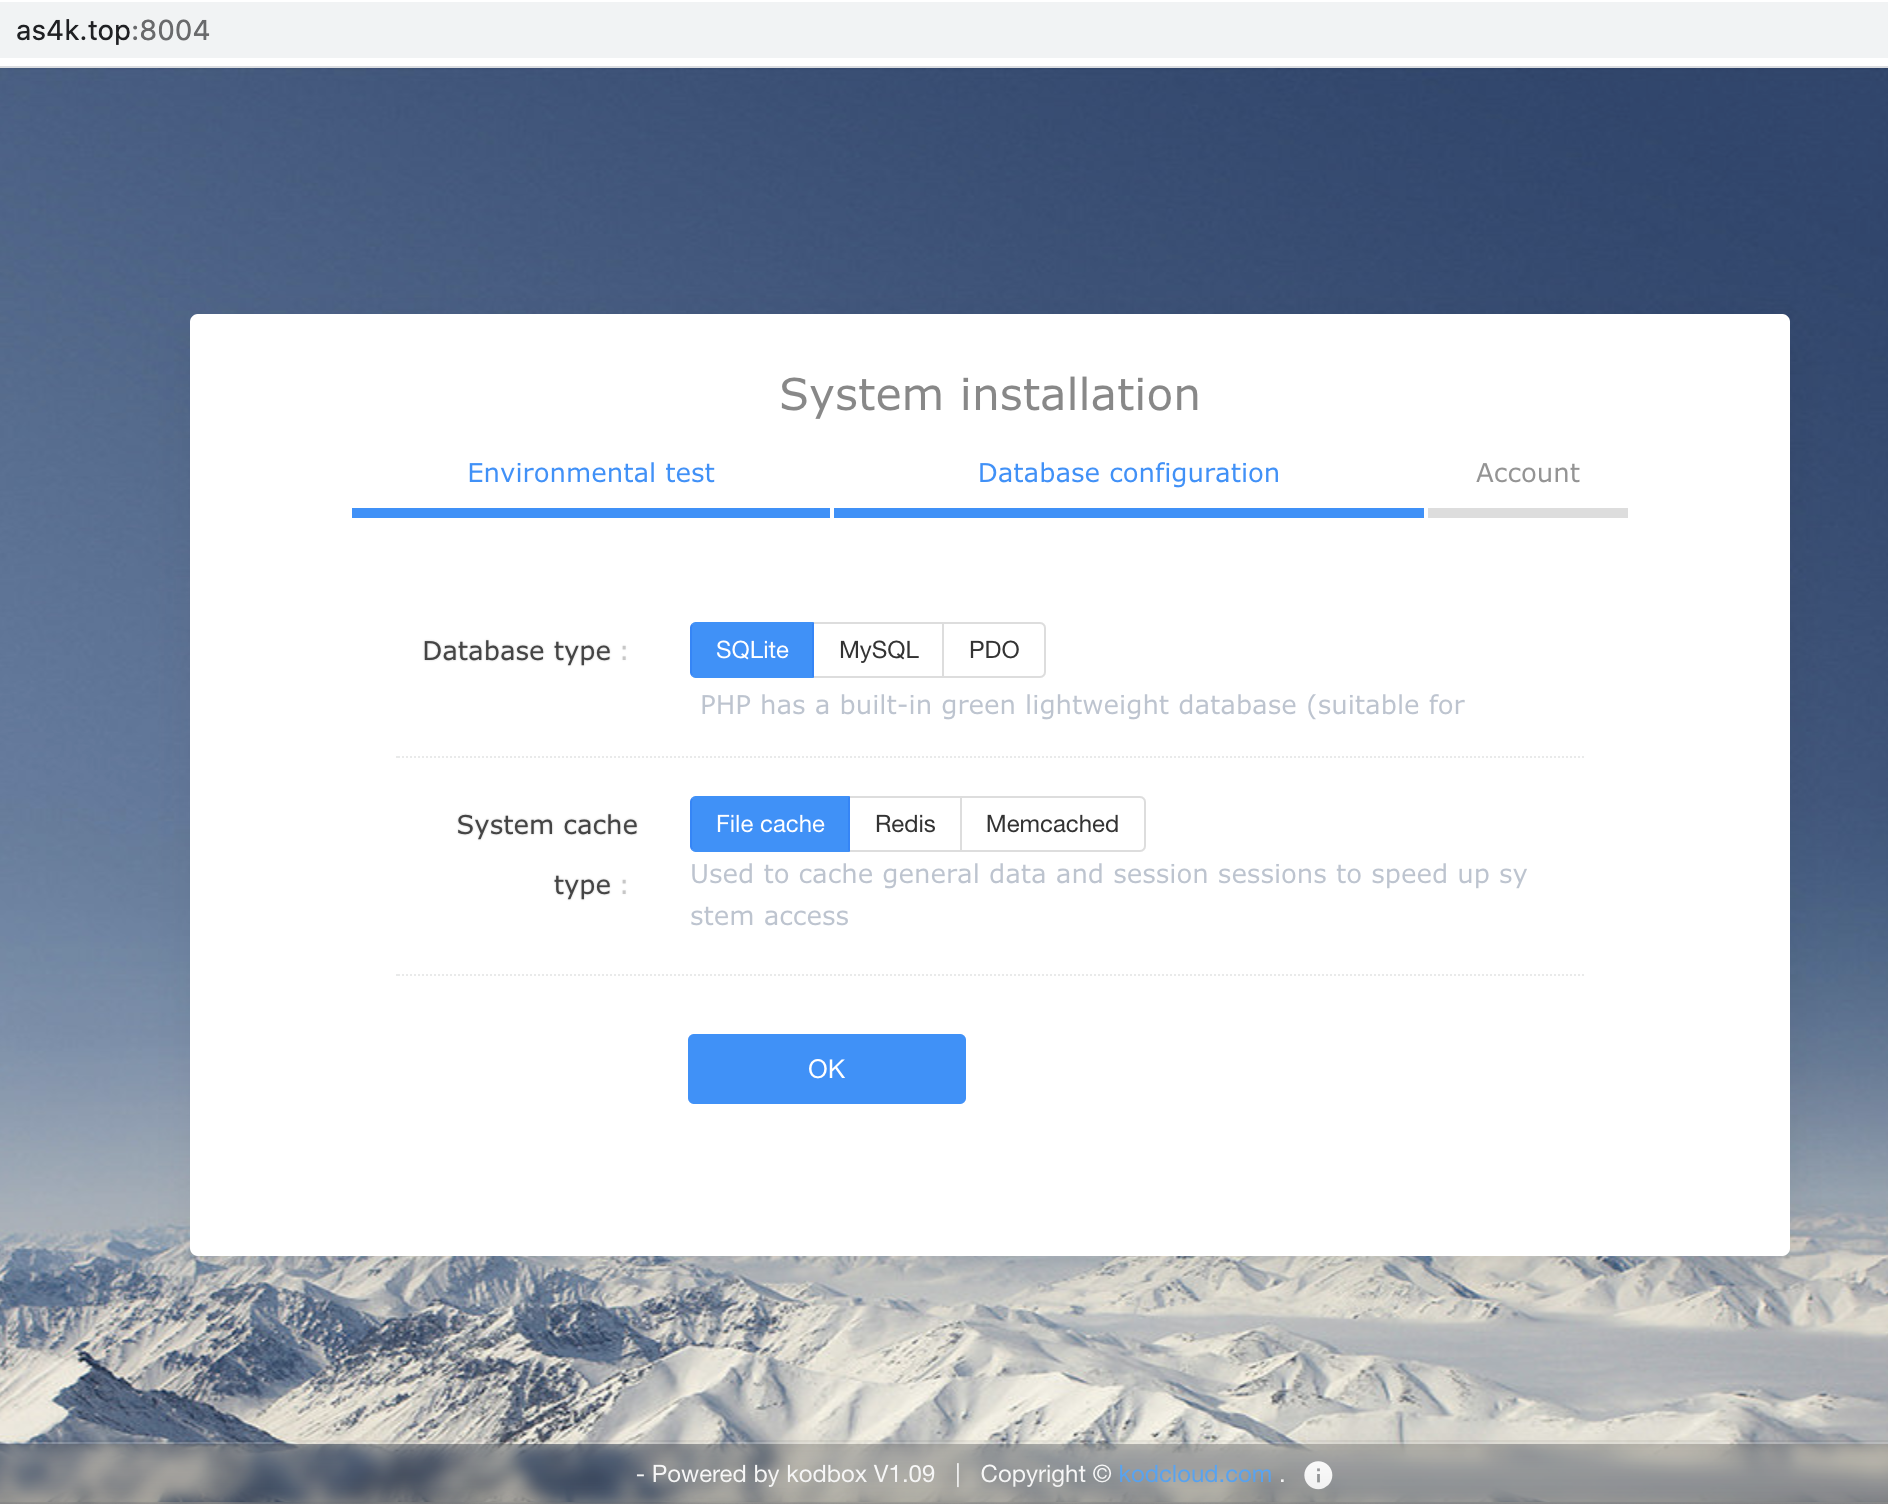
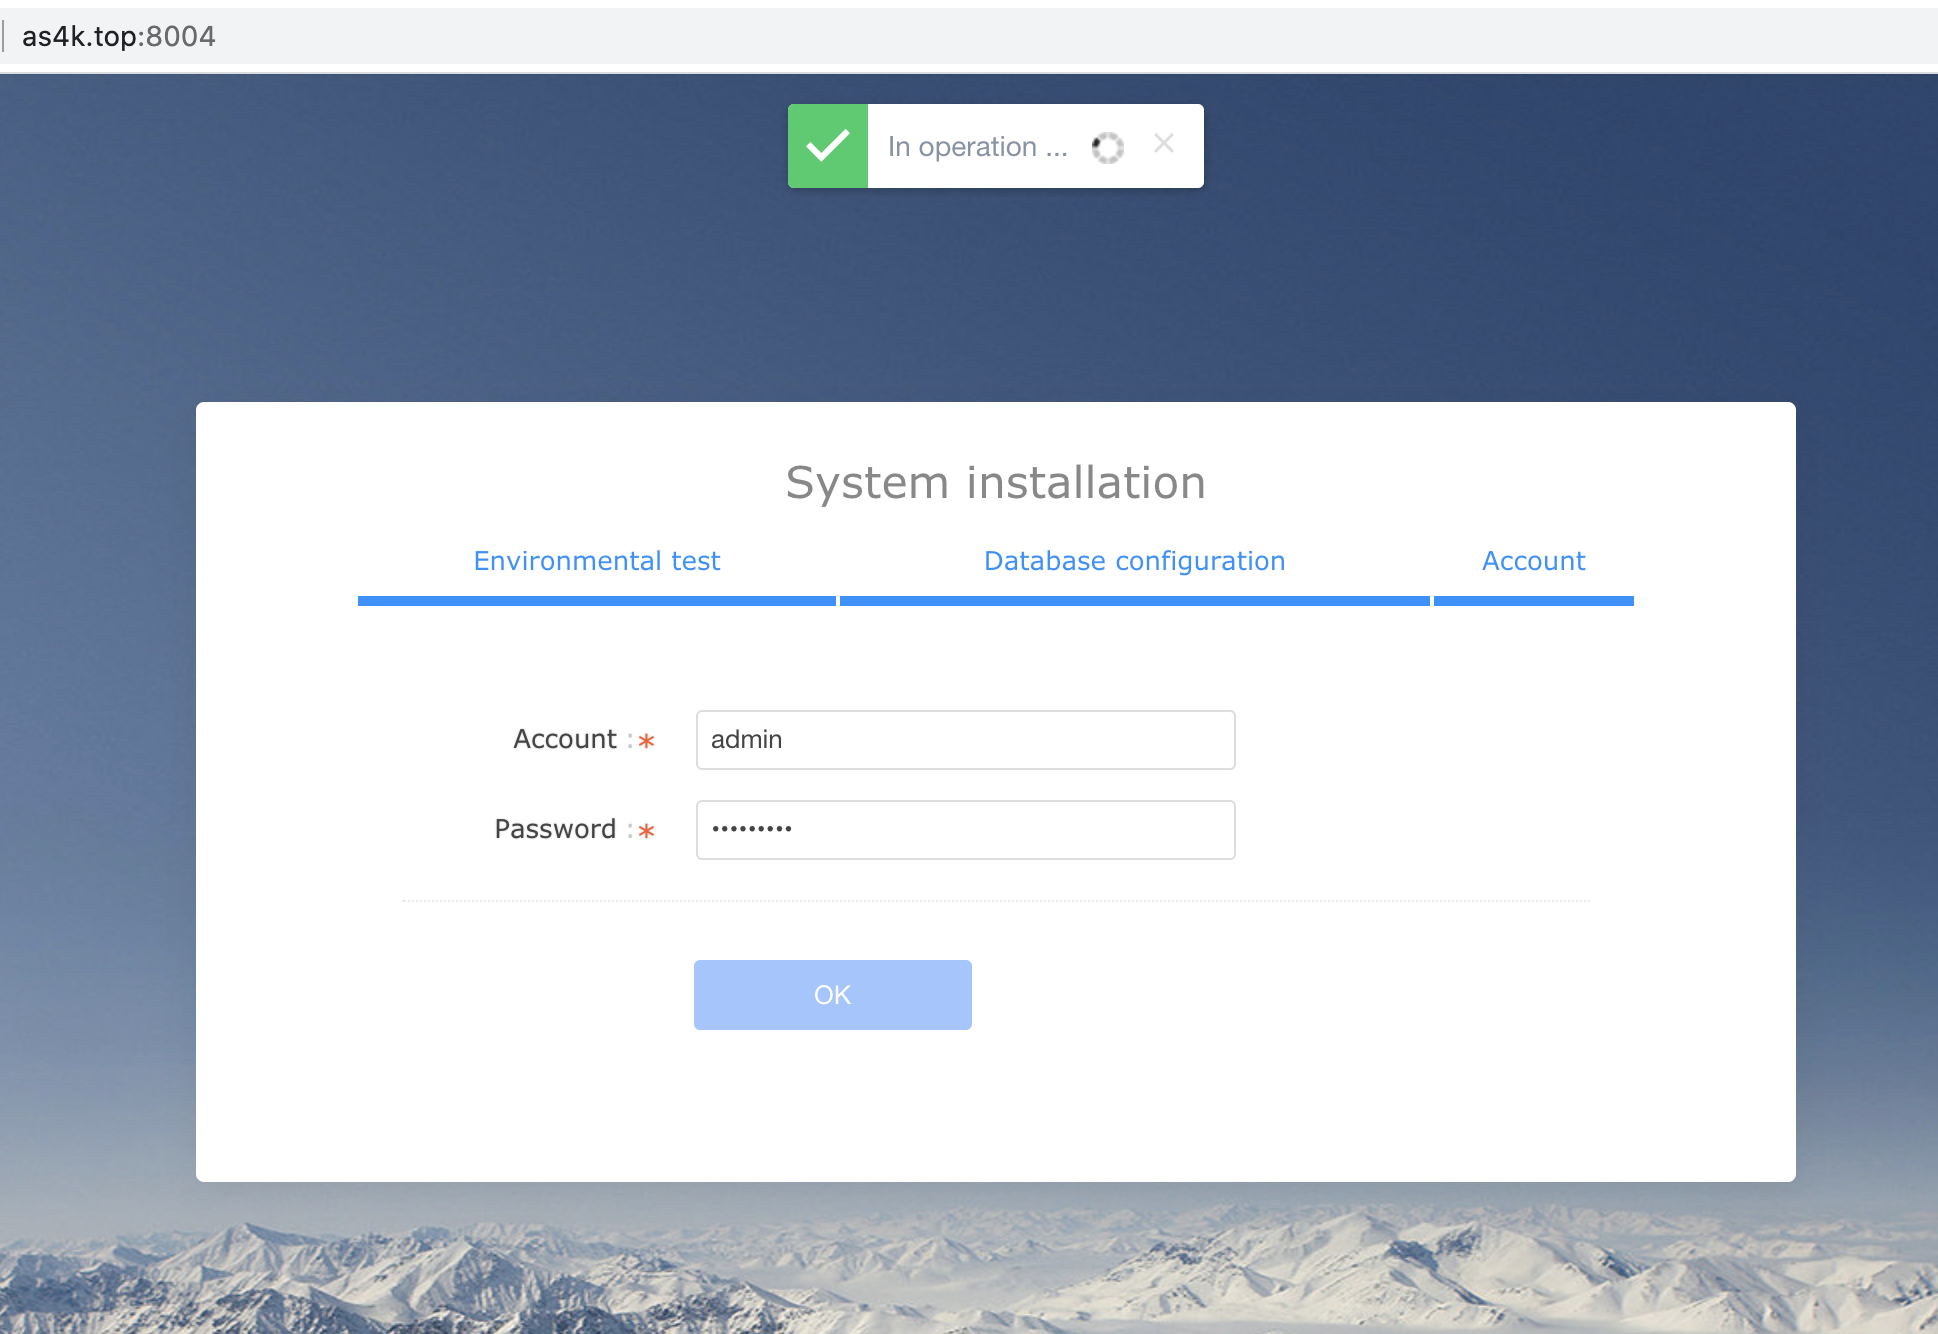
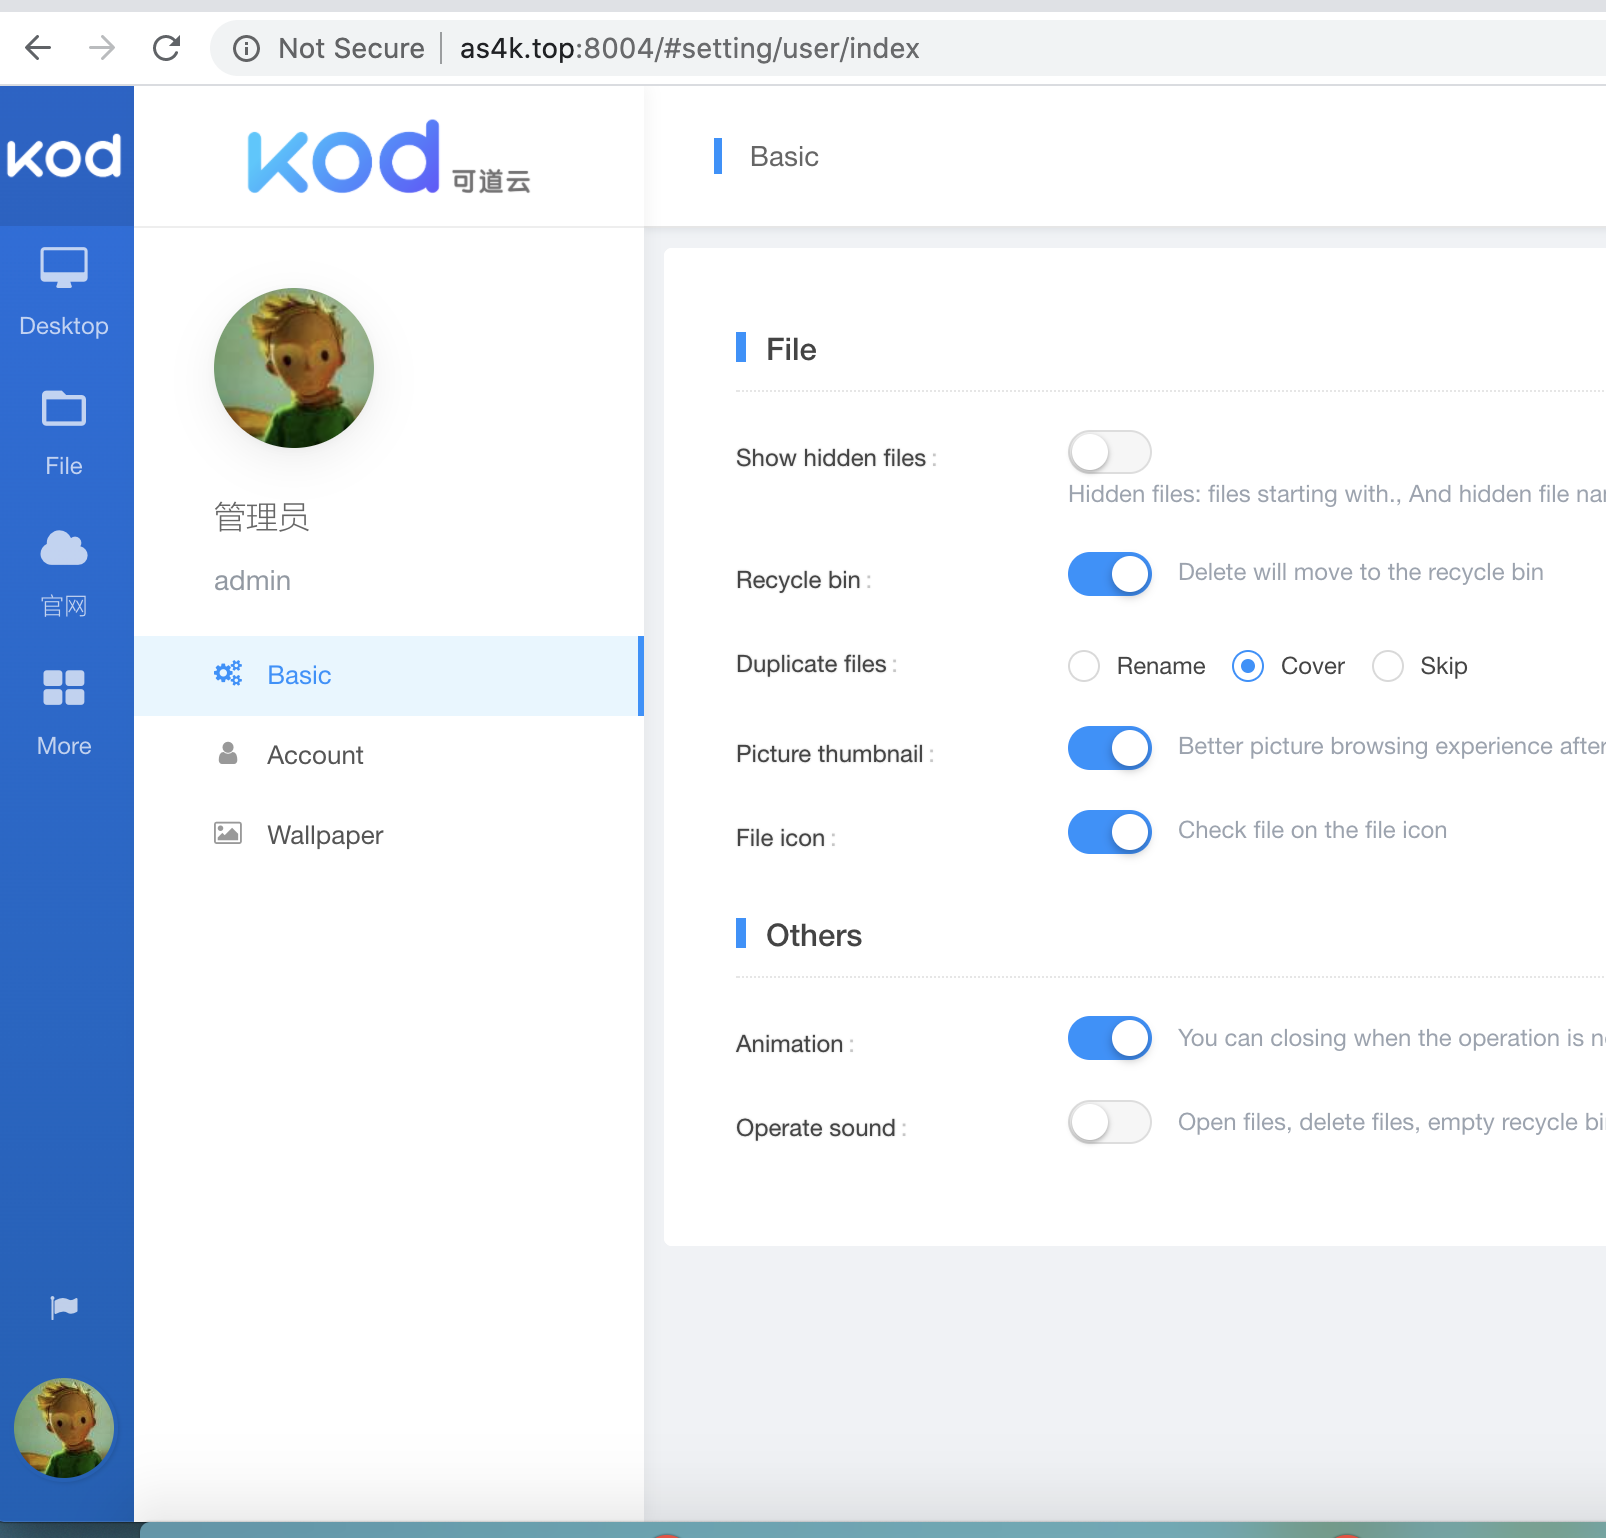
部署 新版可道云 KodExplorer KodBox
kodbox 最新版 支持QQ登陆
步骤大致一致,这附几张截图
修改上传文件大小的限制
nginx的更改
Syntax:  client_max_body_size size;
Default: client_max_body_size 1m;
Context: http, server, location
http://nginx.org/en/docs/http/ngx_http_core_module.html#client_max_body_size

php的更改
egrep '^post|^memory|^upload' /etc/php.ini
post_max_size = 1024M
memory_limit = 1024M
upload_max_filesize = 1024M

sed操作如下:
sed -i '/^post_max_size/c post_max_size = 1024M' /etc/php.ini
sed -i '/^memory_limit/c memory_limit = 512M' /etc/php.ini
sed -i '/^upload_max_filesize/c upload_max_filesize = 1024M' /etc/php.ini
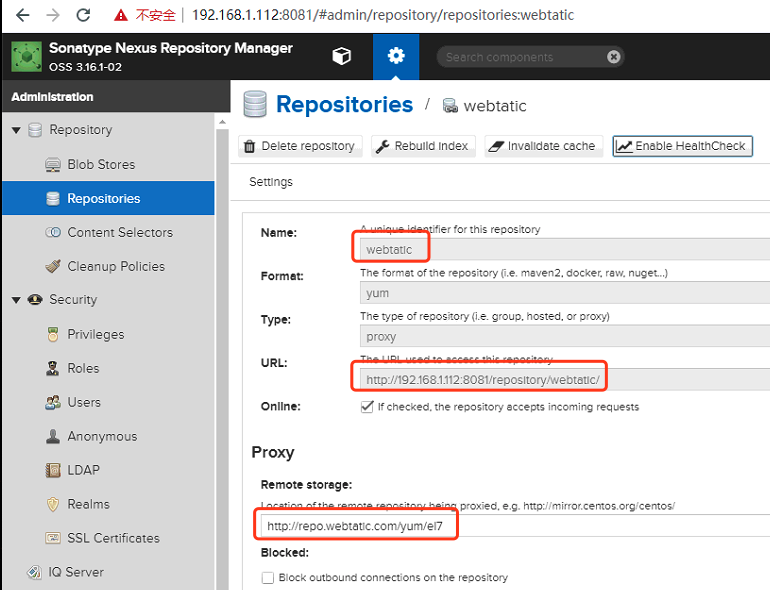
nexus 离线安装PHP
提前配置好,base和epel源
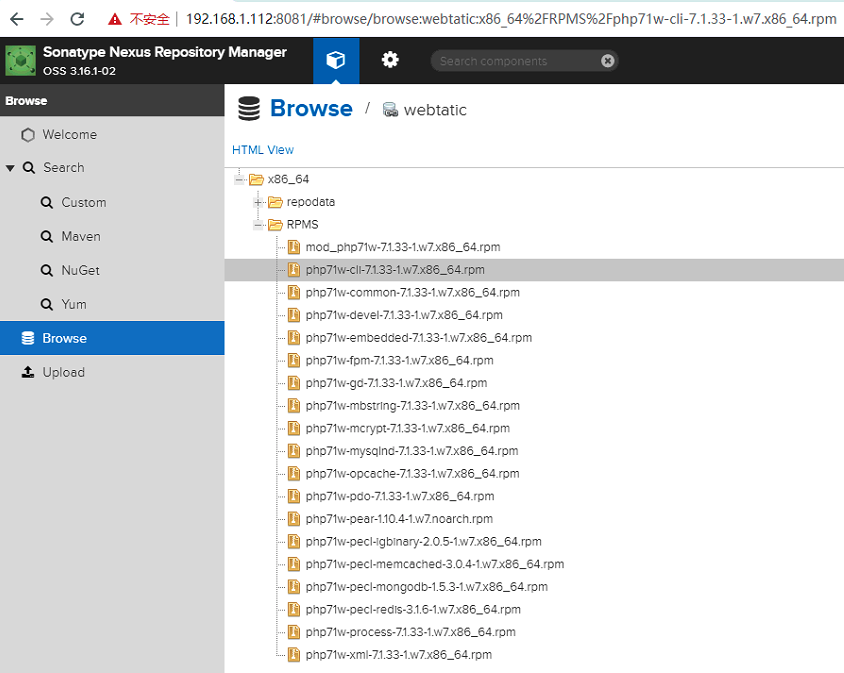
cat << 'EOF' > /etc/yum.repos.d/webtatic.repo
[webtatic]
name=Webtatic Repository EL7 - $basearch
#mirrorlist=https://mirror.webtatic.com/yum/el7/$basearch/mirrorlist
#baseurl=http://repo.webtatic.com/yum/el7/$basearch/
baseurl=http://192.168.1.112:8081/repository/webtatic/$basearch/
#failovermethod=priority
enabled=1
gpgcheck=0
EOF

yum clean all

yum install php71w php71w-cli php71w-common php71w-devel \
php71w-embedded php71w-gd php71w-mcrypt php71w-mbstring \
php71w-pdo php71w-xml php71w-fpm php71w-mysqlnd php71w-opcache \
php71w-pecl-memcached php71w-pecl-redis php71w-pecl-mongodb
参考资料
相关资源
https://hub.docker.com/_/php?tab=description

docker pull php:7.4-fpm

[root@node2 ~]# docker images
REPOSITORY            TAG                 IMAGE ID            CREATED             SIZE
php                   7.4-fpm             f4f49297a5d8        11 days ago         405MB


Download MySQL Community Server
https://dev.mysql.com/downloads/mysql/

Installing and Upgrading MySQL
https://dev.mysql.com/doc/refman/5.7/en/installing.html

Installing MySQL on Linux Using the MySQL Yum Repository
https://dev.mysql.com/doc/refman/5.7/en/linux-installation-yum-repo.html

How to use yum to download a RPM package without installing it
http://ask.xmodulo.com/yum-download-rpm-package.html

https://blog.remirepo.net/pages/Config-en
https://mirrors.tuna.tsinghua.edu.cn/remi/

程序管理工具之yum详解
http://blog.sina.com.cn/s/blog_130affe1d0102vy01.html

Installing WordPress
https://codex.wordpress.org/Installing_WordPress

wordpress官方英文下载
https://wordpress.org/download/

wordpress官方简体中文下载
https://cn.wordpress.org/download/

WeCenter官网
http://www.wecenter.com/

WeCenter官方简单安装帮助
http://www.wecenter.com/category/help/intall/

edusoho官方安装教程(需登录)
http://www.qiqiuyu.com/my/course/20

List of php.ini directives
http://php.net/manual/en/ini.list.php
编译安装php
https://www.cnblogs.com/l5gw/p/10992958.html
https://www.php.net/manual/zh/install.unix.php
直接从 Git 源文件或者自己修改过的包编译时可能需要:

autoconf: 2.13+(PHP < 5.4.0),2.59+(PHP >= 5.4.0)
automake: 1.4+
libtool: 1.4.x+(除了 1.4.2)
re2c: 版本 0.13.4 或更高
flex: 版本 2.5.4(PHP <= 5.2)
bison: 版本 1.28(建议),1.35 或 1.75

yum install bison autoconf automake libtool re2c flex bison
yum install libxml2 libxml2-devel openssl openssl-devel libcurl libcurl-devel install libjpeg libjpeg-devel libpng libpng-devel freetype freetype-devel libmcrypt-devel gcc sqlite-devel

https://www.php.net/distributions/php-7.4.4.tar.gz
PHP 依赖管理
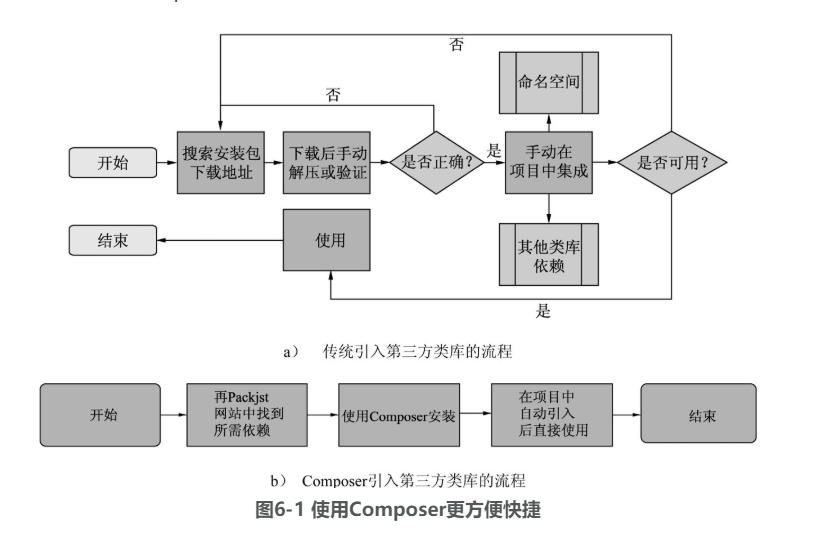
Composer是PHP用来管理依赖关系(dependency)的工具。通常,在开发PHP项目时会引用一些第三方的类库工具,而第三方的类库工具也许还会依赖一些其他工具。如果手动管理则会比较烦琐,而使用Composer则会大大简化依赖管理操作。类似的管理依赖工具,在前面章节中曾经使用过,就是Node.js中的NPM包管理工具。这些工具仅在使用命令行操作的情况下使用,实现自动下载、安装和管理第三方工具类库。使用Composer的必要前提有:·PHP版本要高于PHP 5.3.2。·PHP支持OpenSSL扩展。·安装有Git版本管理工具。Composer支持跨平台安装,支持Mac OS、Linux和Windows等主流操作系统。传统引入第三方类库的流程和Composer引入第三方类库的流程的不同,如图6-1所示。
https://weread.qq.com/web/reader/99b32dd0715c8f7e99b07cak45c322601945c48cce2e120
草稿
curl -o thatpage.html http://www.netscape.com/
curl -o install-php-extensions https://raw.githubusercontent.com/mlocati/docker-php-extension-installer/master/install-php-extensions
php 容器
php容器 配合 nginx 快速看到效果
######################################## 1 yum 安装 nginx ####################
省略
######################################## 2 准备 nginx 配置文件 ####################
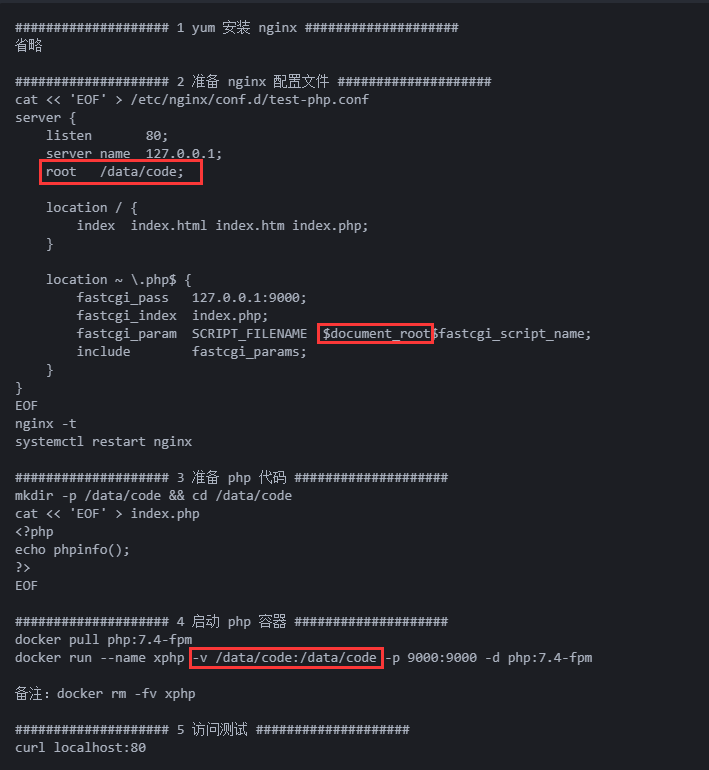
cat << 'EOF' > /etc/nginx/conf.d/test-php.conf
server {
listen 80;
server_name 127.0.0.1;
root /data/code;
location / {
index index.html index.htm index.php;
}
location ~ \.php$ {
fastcgi_pass 127.0.0.1:9000;
fastcgi_index index.php;
fastcgi_param SCRIPT_FILENAME $document_root$fastcgi_script_name;
include fastcgi_params;
}
}
EOF
nginx -t
systemctl restart nginx
######################################## 3 准备 php 代码 ####################
mkdir -p /data/code && cd /data/code
cat << 'EOF' > index.php
<?php
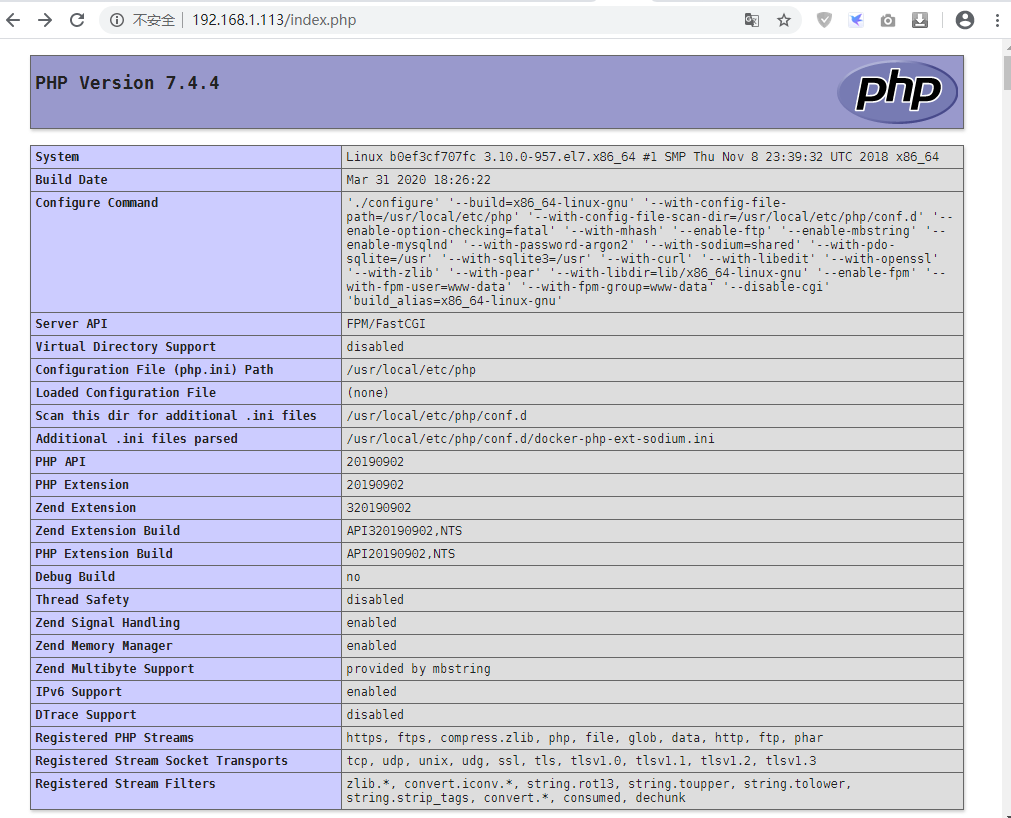
echo phpinfo();
?>
EOF
######################################## 4 启动 php 容器 ####################
安装docker 省略
docker pull php:7.4-fpm
docker run --name xphp -v /data/code:/data/code -p 9000:9000 -d php:7.4-fpm
备注:docker rm -fv xphp
######################################## 5 访问测试 ####################
curl localhost:80
######################################## 6 查看日志 ####################
[root@node2 nginx]# tail -1  /var/log/nginx/access.log
192.168.1.8 - - [12/Apr/2020:23:15:04 +0800] "GET /index.php HTTP/1.1" 200 73928 "-" "Mozilla/5.0 (Windows NT 10.0; Win64; x64) AppleWebKit/537.36 (KHTML, like Gecko) Chrome/80.0.3987.149 Safari/537.36" "-"
[root@node2 nginx]# docker logs --tail 1  xphp
172.17.0.1 -  12/Apr/2020:15:17:00 +0000 "GET /index.php" 200
报错 File not found. 解决
注意看下图
php容器 运行单个php文件
cat << 'EOF' > phpinfo.php
<?php
echo phpinfo();
?>
EOF
docker run -it --rm --name my-running-script -v "$PWD":/usr/src/myapp -w /usr/src/myapp php:7.4-fpm php phpinfo.php