ssh
概览
ssh — OpenSSH SSH client (remote login program)
man ssh

ssh 默认使用 22 端口通信
netstat -lntup | grep ssh

systemctl status sshd

rpm -qa | grep ssh

[dc2-user@10-255-20-218 ~]$ rpm -ql  openssh-clients
/etc/ssh/ssh_config
/usr/bin/scp
/usr/bin/sftp
/usr/bin/slogin
/usr/bin/ssh
/usr/bin/ssh-add
/usr/bin/ssh-agent
/usr/bin/ssh-copy-id
/usr/bin/ssh-keyscan
......


[dc2-user@10-255-20-218 ~]$ rpm -ql  openssh-server
/etc/pam.d/sshd
/etc/ssh/sshd_config
/etc/sysconfig/sshd
/usr/lib/systemd/system/sshd.service
......


ssh 192.168.1.10
ssh root@192.168.1.10
ssh username@192.168.1.10
ssh -p 22 username@192.168.1.10

ssh node1 echo
ssh node1 hostname -I

ssh -vvv root@192.168.1.10
sshd 配置文件
cat /etc/ssh/sshd_config && echo
配置文件全览
[root@node2 ~]# cat   /etc/ssh/sshd_config
#	$OpenBSD: sshd_config,v 1.100 2016/08/15 12:32:04 naddy Exp $

# This is the sshd server system-wide configuration file.  See
# sshd_config(5) for more information.

# This sshd was compiled with PATH=/usr/local/bin:/usr/bin

# The strategy used for options in the default sshd_config shipped with
# OpenSSH is to specify options with their default value where
# possible, but leave them commented.  Uncommented options override the
# default value.

# If you want to change the port on a SELinux system, you have to tell
# SELinux about this change.
# semanage port -a -t ssh_port_t -p tcp #PORTNUMBER
#
#Port 22
#AddressFamily any
#ListenAddress 0.0.0.0
#ListenAddress ::

HostKey /etc/ssh/ssh_host_rsa_key
#HostKey /etc/ssh/ssh_host_dsa_key
HostKey /etc/ssh/ssh_host_ecdsa_key
HostKey /etc/ssh/ssh_host_ed25519_key

# Ciphers and keying
#RekeyLimit default none

# Logging
#SyslogFacility AUTH
SyslogFacility AUTHPRIV
#LogLevel INFO

# Authentication:

#LoginGraceTime 2m
#PermitRootLogin yes
#StrictModes yes
#MaxAuthTries 6
#MaxSessions 10

#PubkeyAuthentication yes

# The default is to check both .ssh/authorized_keys and .ssh/authorized_keys2
# but this is overridden so installations will only check .ssh/authorized_keys
AuthorizedKeysFile	.ssh/authorized_keys

#AuthorizedPrincipalsFile none

#AuthorizedKeysCommand none
#AuthorizedKeysCommandUser nobody

# For this to work you will also need host keys in /etc/ssh/ssh_known_hosts
#HostbasedAuthentication no
# Change to yes if you don't trust ~/.ssh/known_hosts for
# HostbasedAuthentication
#IgnoreUserKnownHosts no
# Don't read the user's ~/.rhosts and ~/.shosts files
#IgnoreRhosts yes

# To disable tunneled clear text passwords, change to no here!
#PasswordAuthentication yes
#PermitEmptyPasswords no
PasswordAuthentication yes

# Change to no to disable s/key passwords
#ChallengeResponseAuthentication yes
ChallengeResponseAuthentication no

# Kerberos options
#KerberosAuthentication no
#KerberosOrLocalPasswd yes
#KerberosTicketCleanup yes
#KerberosGetAFSToken no
#KerberosUseKuserok yes

# GSSAPI options
GSSAPIAuthentication yes
GSSAPICleanupCredentials no
#GSSAPIStrictAcceptorCheck yes
#GSSAPIKeyExchange no
#GSSAPIEnablek5users no

# Set this to 'yes' to enable PAM authentication, account processing,
# and session processing. If this is enabled, PAM authentication will
# be allowed through the ChallengeResponseAuthentication and
# PasswordAuthentication.  Depending on your PAM configuration,
# PAM authentication via ChallengeResponseAuthentication may bypass
# the setting of "PermitRootLogin without-password".
# If you just want the PAM account and session checks to run without
# PAM authentication, then enable this but set PasswordAuthentication
# and ChallengeResponseAuthentication to 'no'.
# WARNING: 'UsePAM no' is not supported in Red Hat Enterprise Linux and may cause several
# problems.
UsePAM yes

#AllowAgentForwarding yes
#AllowTcpForwarding yes
#GatewayPorts no
X11Forwarding yes
#X11DisplayOffset 10
#X11UseLocalhost yes
#PermitTTY yes
#PrintMotd yes
#PrintLastLog yes
#TCPKeepAlive yes
#UseLogin no
#UsePrivilegeSeparation sandbox
#PermitUserEnvironment no
#Compression delayed
#ClientAliveInterval 0
#ClientAliveCountMax 3
#ShowPatchLevel no
#UseDNS yes
#PidFile /var/run/sshd.pid
#MaxStartups 10:30:100
#PermitTunnel no
#ChrootDirectory none
#VersionAddendum none

# no default banner path
#Banner none

# Accept locale-related environment variables
AcceptEnv LANG LC_CTYPE LC_NUMERIC LC_TIME LC_COLLATE LC_MONETARY LC_MESSAGES
AcceptEnv LC_PAPER LC_NAME LC_ADDRESS LC_TELEPHONE LC_MEASUREMENT
AcceptEnv LC_IDENTIFICATION LC_ALL LANGUAGE
AcceptEnv XMODIFIERS

# override default of no subsystems
Subsystem	sftp	/usr/libexec/openssh/sftp-server

# Example of overriding settings on a per-user basis
#Match User anoncvs
#	X11Forwarding no
#	AllowTcpForwarding no
#	PermitTTY no
#	ForceCommand cvs server
[root@node2 ~]#
常用配置项
Port 监听的端口
PermitEmptyPasswords   是否允许密码为空的用户远程登陆,默认no,表示不允许
PermitRootLogin        是否允许root用户直接ssh登陆,yes允许,no禁止
UseDNS                 一般都设置为no,加快登陆上机器的速度,不需要反向解析IP
PermitRootLogin yes    允许root登陆
更多配置项 man sshd_config

修改配置后需要重启服务  systemctl restart sshd
调整配置使机器可以root直接登陆
# echo "xys829475K" | passwd --stdin root
# egrep -v "^$|^#" /etc/ssh/sshd_config.bak  > /etc/ssh/sshd_config

# 允许root登陆 保证下面这行配置有就可以了
PermitRootLogin yes
ssh 命令使用
man ssh

ssh [-i identity_file] [-o option] [-p port] [user@]hostname [command]

ssh 192.168.1.9
ssh node1
ssh root@node1
ssh -p 22 root@node1
ssh -p 22 root@baidu.com
ssh -p 22 user1@192.168.1.9


ssh node1 echo hello
ssh node1 hostname -I

第1次连接时,会提示输入yes确认,之后会在本地的 ~/.ssh/known_hosts 生产一条密钥文件,如果发生密钥登陆冲突(比如同一台机器重装系统了,则把这条密钥删掉重新连接即可),如下所示

[root@node1 ~]# ssh root@192.168.1.112
The authenticity of host '192.168.1.112 (192.168.1.112)' can't be established.
ECDSA key fingerprint is SHA256:G2IJANu1Lrtz2RRPMXPyWdSwozenlwf8jfQOaDSJnNA.
ECDSA key fingerprint is MD5:8f:2d:dc:49:e7:17:ca:a5:80:40:e2:7d:6b:77:d6:fd.
Are you sure you want to continue connecting (yes/no)? yes
Warning: Permanently added '192.168.1.112' (ECDSA) to the list of known hosts.
Last login: Wed Apr  1 09:46:01 2020 from 192.168.1.8
[root@node1 ~]# cat /root/.ssh/known_hosts
192.168.1.112 ecdsa-sha2-nistp256 AAAAE2VjZHNhLXNoYTItbmlzdHAyNTYAAAAIbmlzdHAyNTYAAABBBCVKx7janxHsfiJdaHwEwGOFD56ZbSnZDFVsw3Lnr3/CIvWMm5WVIidA7syfkAp0vyKjbzBUN37R6hmEl09PPPE=
[root@node1 ~]# ssh 192.168.1.112 hostname -I
192.168.1.112 172.17.0.1 2408:8207:7897:f130:a00:27ff:fee7:284
scp 命令使用
这个命令依托于sshd服务,是最方便的,跨机器传输文件的工具了,可以把本机的文件传输到远端机器,也可以把远端的机器传输到本地
man scp
[root@node1 ~]# scp
usage: scp [-12346BCpqrv] [-c cipher] [-F ssh_config] [-i identity_file]
           [-l limit] [-o ssh_option] [-P port] [-S program]
           [[user@]host1:]file1 ... [[user@]host2:]file2

scp hello.txt root@192.168.1.112:/tmp
scp root@192.168.1.112:/tmp/hello.txt .

如果是拷贝目录,可以加上 -rp 参数

使用scp每次做的都是全量拷贝,无法实现增量拷贝

使用scp拷贝文件,需要知道远程服务器对应用户的登陆密码,或者是两台机器之间已经做了免密
免密登陆
https://blog.csdn.net/xys2015/article/details/110442383
SSH连接复用
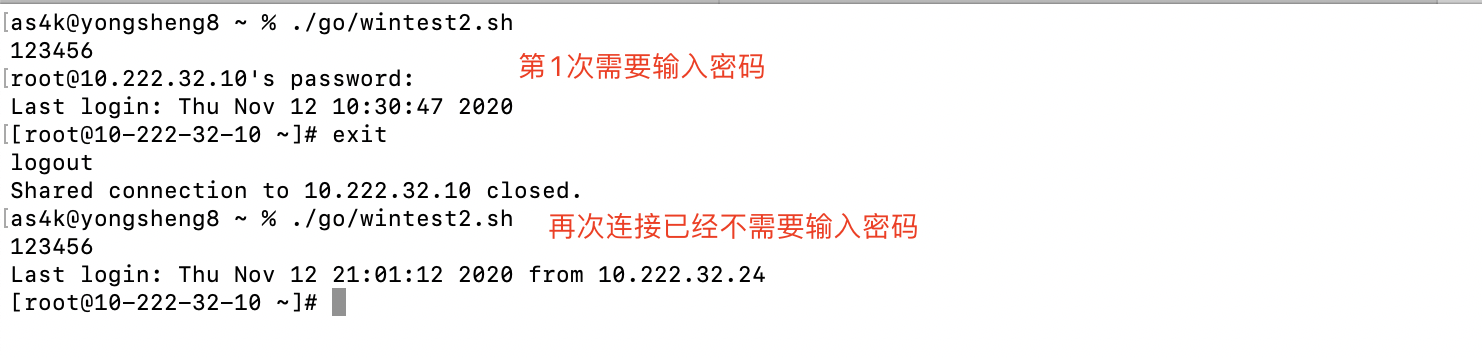
场景:SSH连接复用是SSH客户端的配置,开启之后只要我们连接一次机器,即便是我们用6位动态密码连接的机器,第1次成功连接后,后面均无需再输入密码
ControlPersist 特性需要高版本的 SSH 才支持,CentOS 6 默认是不支持的,如果需要使用,需要自行升级 openssh。ControlPersist 即持久化 socket,一次验证,多次通信。
# cat  ~/.ssh/config
Host *
ControlMaster auto
ControlPath ~/.ssh/%r@%h:%p.sock
ControlPersist 10h
- 没有
~/.ssh/config这个文件,新创建即可 - ControlPersist 表示持续时间10消失
- ControlPath sock文件生成路径
效果演示
csdn 109657408
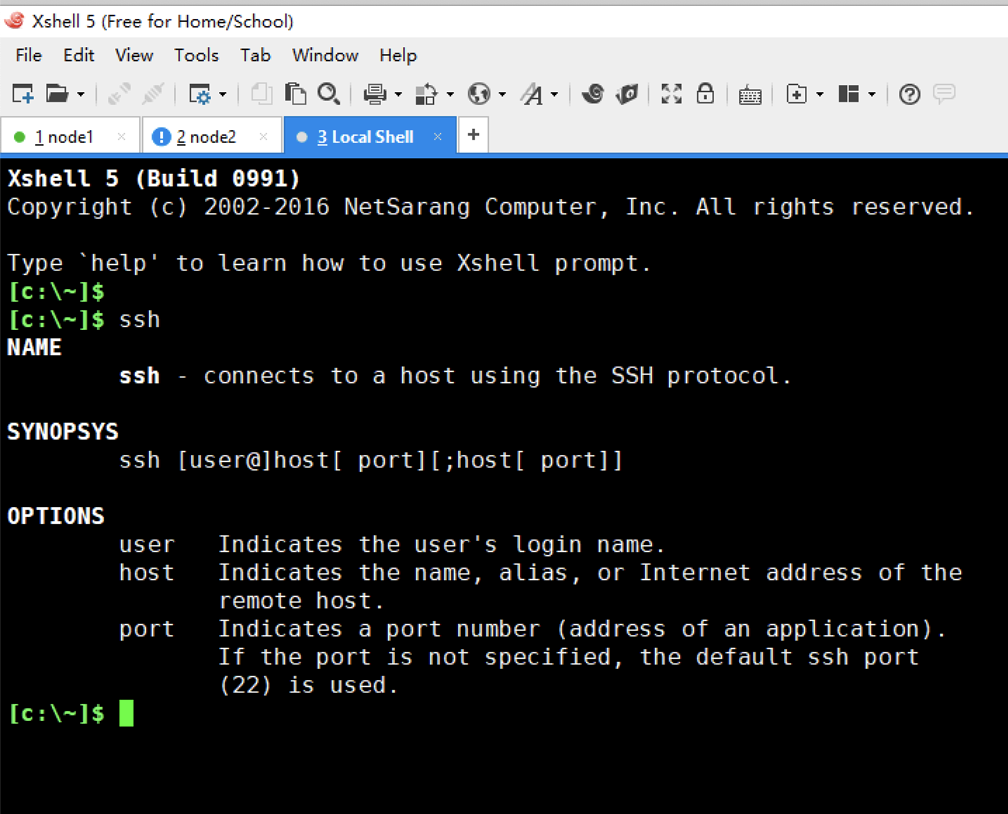
xshell ssh 帮助
xshell 5
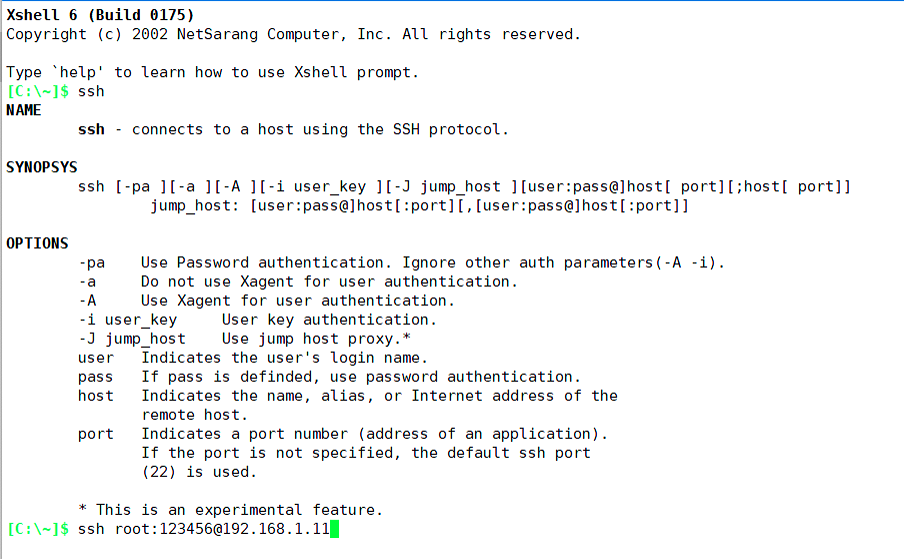
xshell 6
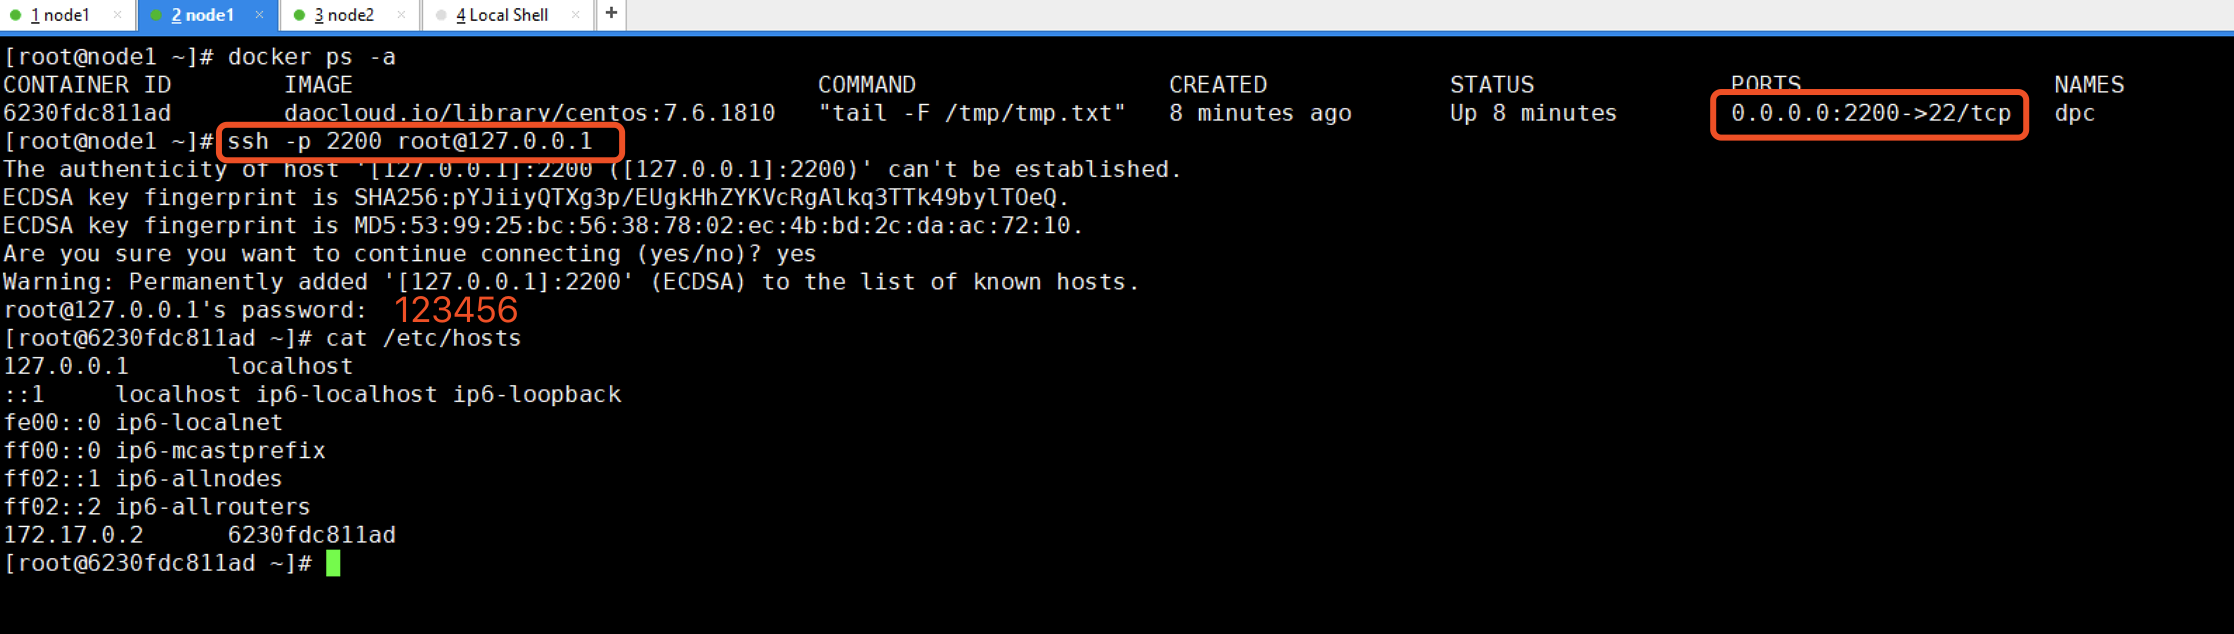
给docker容器增加ssh服务
docker run --detach --rm --name dpc -p 2200:22  -v /root:/opt -w /opt daocloud.io/library/centos:7.6.1810 tail -F /tmp/tmp.txt
docker exec -it dpc bash
yum install passwd openssl openssh-server openssh-clients net-tools

mkdir -p /var/run/ssh
ssh-keygen -q -t rsa -b 2048 -f /etc/ssh/ssh_host_rsa_key -N ''
ssh-keygen -q -t ecdsa -f /etc/ssh/ssh_host_ecdsa_key -N ''
ssh-keygen -t dsa -f /etc/ssh/ssh_host_ed25519_key -N ''

sed -i "s/#UsePrivilegeSeparation.*/UsePrivilegeSeparation no/g" /etc/ssh/sshd_config
sed -i "s/UsePAM.*/UsePAM no/g" /etc/ssh/sshd_config
echo 123456 | passwd --stdin root

/usr/sbin/sshd -D &

参考资料 https://www.cnblogs.com/ruanqj/p/7374544.html
延长终端保持时间 避免自动掉线
[root@xingyongsheng ~]# egrep -v "^$|^#" /etc/ssh/sshd_config
HostKey /etc/ssh/ssh_host_rsa_key
HostKey /etc/ssh/ssh_host_ecdsa_key
HostKey /etc/ssh/ssh_host_ed25519_key
AuthorizedKeysFile	.ssh/authorized_keys
ChallengeResponseAuthentication no
GSSAPIAuthentication yes
GSSAPICleanupCredentials no
UsePAM yes
X11Forwarding yes

#  增加下面两行参数
ClientAliveInterval 7200
ClientAliveCountMax 3
#############

AcceptEnv LANG LC_CTYPE LC_NUMERIC LC_TIME LC_COLLATE LC_MONETARY LC_MESSAGES
AcceptEnv LC_PAPER LC_NAME LC_ADDRESS LC_TELEPHONE LC_MEASUREMENT
AcceptEnv LC_IDENTIFICATION LC_ALL LANGUAGE
AcceptEnv XMODIFIERS
Subsystem	sftp	/usr/libexec/openssh/sftp-server
UseDNS no
AddressFamily inet
SyslogFacility AUTHPRIV
PermitRootLogin yes
PasswordAuthentication no

https://blog.51cto.com/leoheng/1964135

ClientAliveInterval指定了服务器端向客户端请求消息 的时间间隔, 默认是0, 不发送. ClientAliveInterval 7200表示每2个小时发送一次, 然后客户端响应, 这样就保持长连接了.
ClientAliveCountMax,使用默认值3即可.   ClientAliveCountMax表示服务器发出请求后客户端没有响应的次数达到一定值, 就自动断开.
远程执行命令
[root@shihaohan cluster]# cat  create_swarm.sh
#!/bin/bash

#filename: dp_create_swarm.sh
workdir="$( cd "$( dirname "${BASH_SOURCE[0]}" )" && pwd )"
cd $workdir
source ../manifest.sh

SSH_PORT=22
SSH_CMD="ssh -p $SSH_PORT -oStrictHostKeyChecking=no"
LABEL="manager"

for ip in ${MANAGERS[*]} ${WORKERS[*]}; do
$SSH_CMD $ip docker login registry.as4k.com -uas4k -pas4k
$SSH_CMD $ip docker swarm leave --force
$SSH_CMD $ip mkdir -vp \
$DP_MYSQL_DATA_HOME \
$DP_LOG_HOME \
$DP_LOG_HOME/dpthrall \
$DP_LOG_HOME/sourcedp \
$DP_LOG_HOME/sinkdp \
$DP_LOG_HOME/manager \
$DP_LOG_HOME/thirdparty \
$ZK_DATA_DIR \
$ZK_LOG_DIR \
$ES_DIR \
$KAFKA_DIR \
$REDIS1_DIR \
$REDIS2_DIR \
$REDIS3_DIR \
$WB_LIST \
$DP_CODE \
$DP_CODE_LIB \
/root/as4k
rsync -av -e ssh --exclude='cluster' ../* $ip:/root/as4k/
done

sleep 3
docker swarm init
join_manager_str=$(docker swarm join-token manager | grep 2377)
join_worker_str=$(docker swarm join-token worker | grep 2377)
for ip in ${MANAGERS[*]}; do $SSH_CMD $ip $join_manager_str; done
for ip in ${WORKERS[*]};  do $SSH_CMD $ip $join_worker_str; done

i=0
for ip in ${MANAGERS[*]} ${WORKERS[*]}; do
let i++
h=$($SSH_CMD $ip hostname)
docker node update --label-add host_id=${LABEL}-${i} $h
done

echo "docker swarm statsu are below:"
echo "########################################################################################"
docker node ls
for ip in ${MANAGERS[*]} ${WORKERS[*]}; do
h="$($SSH_CMD $ip hostname)"
docker node inspect --pretty $h | sed -n '/Labels/,/Hostname/p'
done

docker swarm update --dispatcher-heartbeat 2m


##################################################################
https://www.cnblogs.com/youngerger/p/9104144.html
执行需要交互的命令
ssh -t nick@xxx.xxx.xxx.xxx "top"

远程执行脚本
ssh nick@xxx.xxx.xxx.xxx < test.sh

ssh node2 "cd /root/dp-on-docker-compose/as4k/node2; ./start.sh zk2"
ssh node1 "cd /root/dp-on-docker-compose/as4k/node2; ./stop.sh zk1"
web界面终端
http://web-console.org/
ubuntu no mutual signature algorithm
ubuntu no mutual signature algorithm
https://askubuntu.com/questions/1404049/ssh-without-password-does-not-work-after-upgrading-from-18-04-to-22-04
https://superuser.com/questions/1444319/how-to-check-ssh-key-version-locally
https://blog.csdn.net/halazi100/article/details/124496131

debug
ssh -v  git@xx.github.com.cn
参考资料
https://weread.qq.com/web/reader/36732010719ecf6b3676799k9f6326602389f61408e3715

虚拟机使用ssh命令出现:packet_write_wait: Connection to **** port 22: Broken pipe 解决!
https://blog.csdn.net/qq_31841025/article/details/88992618

Linux ssh命令详解
https://www.cnblogs.com/ftl1012/p/ssh.html