阿胜4K > Core Services > ELK单机日志收集
ELK单机日志收集
单机日志收集平台搭建指南
采用2个elasticsearch容器作为日志(索引)存放目的地,数据持久化到本地,每一类日志启动一个filebeat容器来收集,只需把需要收集的日志挂在到filebeat容器中,并且让filebeat用户具有读取权限(uid:1000),在本地持久化一套filebeat的日志配置文件。
需要的目录结构
##################### 整体结构
[root@worker1 elastic]# tree -L 2 /data//elastic/
/data//elastic/
├── elasticsearch1
│   ├── data #存放收集上来的日志
│   └── logs
├── elasticsearch2
│   ├── data #存放收集上来的日志
│   └── logs
├── filebeat
│   ├── data #这里会维护日志收集的进度
│   ├── var-log-messages.yml #收集日志的规则与配置
│   └── var-log-secure.yml   #收集日志的规则与配置
└── kibana
    └── data #持久化kibana的一些状态

11 directories, 5 files

[root@worker1 opt]# tree /opt/elk-single/
/opt/elk-single/
├── docker-compose.yml #单机ELK容器编排文件
├── elasticsearch-6.5.4.tar #容器镜像
├── filebeat-6.5.4.tar      #容器镜像
└── kibana-6.5.4.tar        #容器镜像

0 directories, 4 files

################################### 创建目录的命令
mkdir -p /data/elastic/elasticsearch{1,2}/{data,logs}
mkdir -p /data/elastic/filebeat/data
mkdir -p /data/elastic/kibana/data
chown -R 1000:1000 /data/elastic
mkdir -p /opt/elk-single/
################################## 准备对应日志filebeat配置文件
sourcedp-fb.yml
目录结构
[root@worker1 log]#  tree /data/datapipeline/log/sourcedp/
/data/datapipeline/log/sourcedp/
├── 534dd492195b.log
├── 688cc28f06e7.log
├── 688cc28f06e7.log.2019-01-25-11
├── 688cc28f06e7.log.2019-01-25-12
├── 688cc28f06e7.log.2019-01-25-13
├── 688cc28f06e7.log.2019-01-25-14
├── 688cc28f06e7.log.2019-01-25-15
├── 688cc28f06e7.log.2019-01-25-16
├── 688cc28f06e7.log.2019-01-25-17
├── 688cc28f06e7.log.2019-01-25-18
├── 688cc28f06e7.log.2019-01-25-19
################################ 创建
# cat /data/elastic/filebeat/sourcedp-fb.yml
filebeat.inputs:
- type: log
  paths:
    - /opt/sourcedp/*

output.elasticsearch:
  hosts: ["es1:9200"]
  index: "sourcedp-%{[beat.version]}-%{+yyyy.MM.dd}"

setup.template.name: "sourcedp"
setup.template.pattern: "sourcedp-*"

setup.kibana:
  host: "kb:5601"

setup.dashboards.index: "sourcedp-*"
# chown 1000:1000 /data/elastic/filebeat/sourcedp-fb.yml
manager-fb.yml
目录结构
[root@worker1 log]#  tree /data/datapipeline/log/manager/
/data/datapipeline/log/manager/
├── 06186a5d896e.log
├── 8e9eb2055bdd.log
├── 8e9eb2055bdd.log.2019-01-25-11
├── 8e9eb2055bdd.log.2019-01-25-12
├── 8e9eb2055bdd.log.2019-01-25-13
├── 8e9eb2055bdd.log.2019-01-25-14
├── 8e9eb2055bdd.log.2019-01-25-15
├── 8e9eb2055bdd.log.2019-01-25-16
├── 8e9eb2055bdd.log.2019-01-25-17
├── 8e9eb2055bdd.log.2019-01-25-18
├── 8e9eb2055bdd.log.2019-01-25-19
├── 8e9eb2055bdd.log.2019-01-25-20
├── 8e9eb2055bdd.log.2019-01-25-21
创建
# cat /data/elastic/filebeat/manager-fb.yml
filebeat.inputs:
- type: log
  paths:
    - /opt/manager/*

output.elasticsearch:
  hosts: ["es1:9200"]
  index: "manager-%{[beat.version]}-%{+yyyy.MM.dd}"

setup.template.name: "manager"
setup.template.pattern: "manager-*"

setup.kibana:
  host: "kb:5601"

setup.dashboards.index: "manager-*"
# chown 1000:1000 /data/elastic/filebeat/manager-fb.yml
################################# 核心docker-compose文件如下
[root@manager1 elk-single]# cat /opt/elk-single/docker-compose.yml
version: '2.2'
services:
  elasticsearch1:
    image: registry.datapipeline.com/elasticsearch:6.5.4
    container_name: es1
    healthcheck:
      test: "curl -X GET 'localhost:9200'"
      interval: 10s
      timeout: 5s
      retries: 5
    ports:
      - 9200:9200
    #restart: always
    ulimits:
      memlock:
        soft: -1
        hard: -1
    environment:
      - network.host=0.0.0.0
      - cluster.name=es-cluster
      - bootstrap.memory_lock=true
      - "ES_JAVA_OPTS=-Xms512m -Xmx512m"
    volumes:
      - /data/elastic/elasticsearch1/logs:/usr/share/elasticsearch/logs
      - /data/elastic/elasticsearch1/data:/usr/share/elasticsearch/data
    networks:
      - elk-stack

  elasticsearch2:
    image: registry.datapipeline.com/elasticsearch:6.5.4
    container_name: es2
    healthcheck:
      test: "curl -X GET 'localhost:9200'"
      interval: 10s
      timeout: 5s
      retries: 5
    depends_on:
      elasticsearch1:
        condition: service_healthy
    #restart: always
    ulimits:
      memlock:
        soft: -1
        hard: -1
    environment:
      - network.host=0.0.0.0
      - cluster.name=es-cluster
      - bootstrap.memory_lock=true
      - "ES_JAVA_OPTS=-Xms512m -Xmx512m"
      - "discovery.zen.ping.unicast.hosts=es1"
    volumes:
      - /data/elastic/elasticsearch2/logs:/usr/share/elasticsearch/logs
      - /data/elastic/elasticsearch2/data:/usr/share/elasticsearch/data
    networks:
      - elk-stack

  kibana:
    image: registry.datapipeline.com/kibana:6.5.4
    container_name: kb
    #restart: always
    #curl -s -X GET 'localhost:5601/api/status' | grep -v 'Kibana server is not ready yet'
    healthcheck:
      test: "curl -s -X GET 'localhost:5601/api/status' | grep -v 'Kibana server is not ready yet'"
      interval: 10s
      timeout: 5s
      retries: 5
    depends_on:
      elasticsearch1:
        condition: service_healthy
      elasticsearch2:
        condition: service_healthy
    ports:
      - 5601:5601
    environment:
      ELASTICSEARCH_URL: http://es1:9200
    volumes:
      - /data/elastic/kibana/data:/usr/share/kibana/data
    networks:
      - elk-stack

  mes-fb:
    image: registry.datapipeline.com/filebeat:6.5.4
    container_name: mes-fb
    depends_on:
      elasticsearch1:
        condition: service_healthy
      elasticsearch2:
        condition: service_healthy
      kibana:
        condition: service_healthy
    entrypoint:
      - filebeat
      - -e
      # - -E
      # - output.elasticsearch.hosts=["es1:9200"]
    #restart: always
    #environment:
    volumes:
      - /data/elastic/filebeat/mes-fb.yml:/usr/share/filebeat/filebeat.yml
      - /tmp:/opt
      - /data/elastic/filebeat/logs:/usr/share/filebeat/logs
      - /data/elastic/filebeat/data:/usr/share/filebeat/data
    networks:
      - elk-stack

networks:
  elk-stack:
需要的镜像版本一律为6.5.4,需自行从官方下载之后导入本地,没有梯子下载速度可能很慢。

基础操作
启动
cd /opt/elk-single/
docker-compose up
docker-compose up -d
停止
docker ps -aq | xargs docker rm -f
docker-compose down
彻底清空环境
rm -rf /data/elastic/elasticsearch1/logs/*
rm -rf /data/elastic/elasticsearch1/data/*
rm -rf /data/elastic/elasticsearch2/logs/*
rm -rf /data/elastic/elasticsearch2/data/*
rm -rf /data/elastic/kibana/data/*
rm -rf /data/elastic/filebeat/data/*
tree /data/elastic
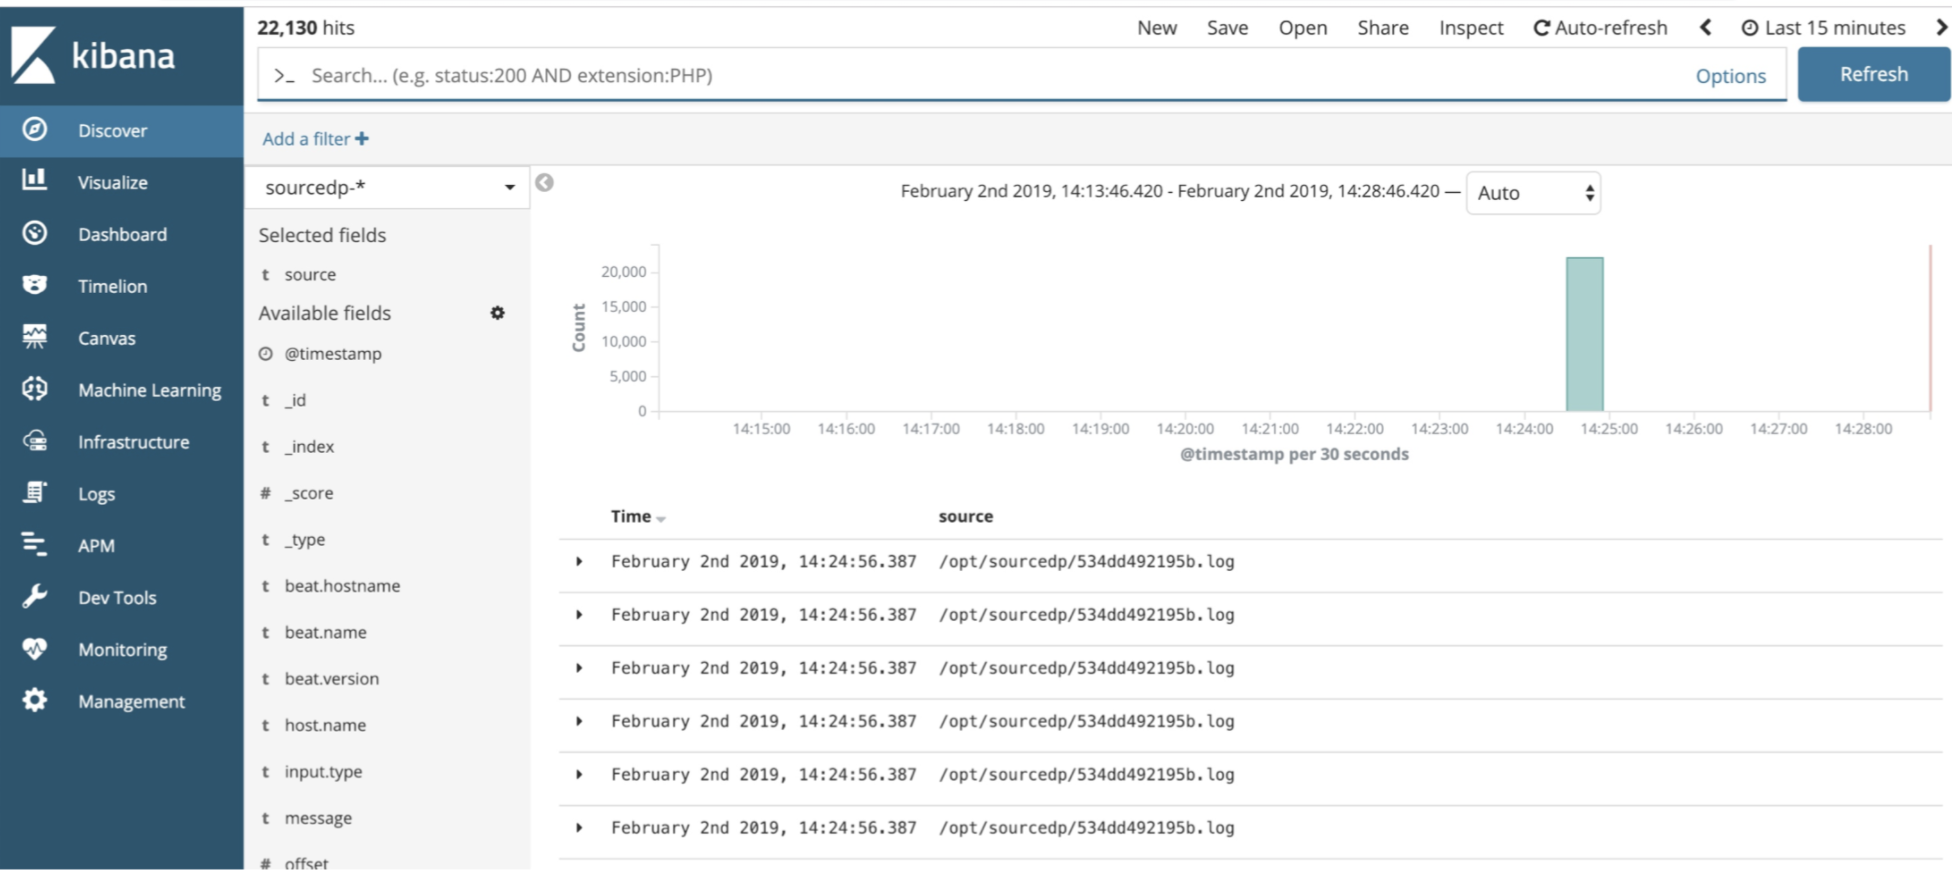
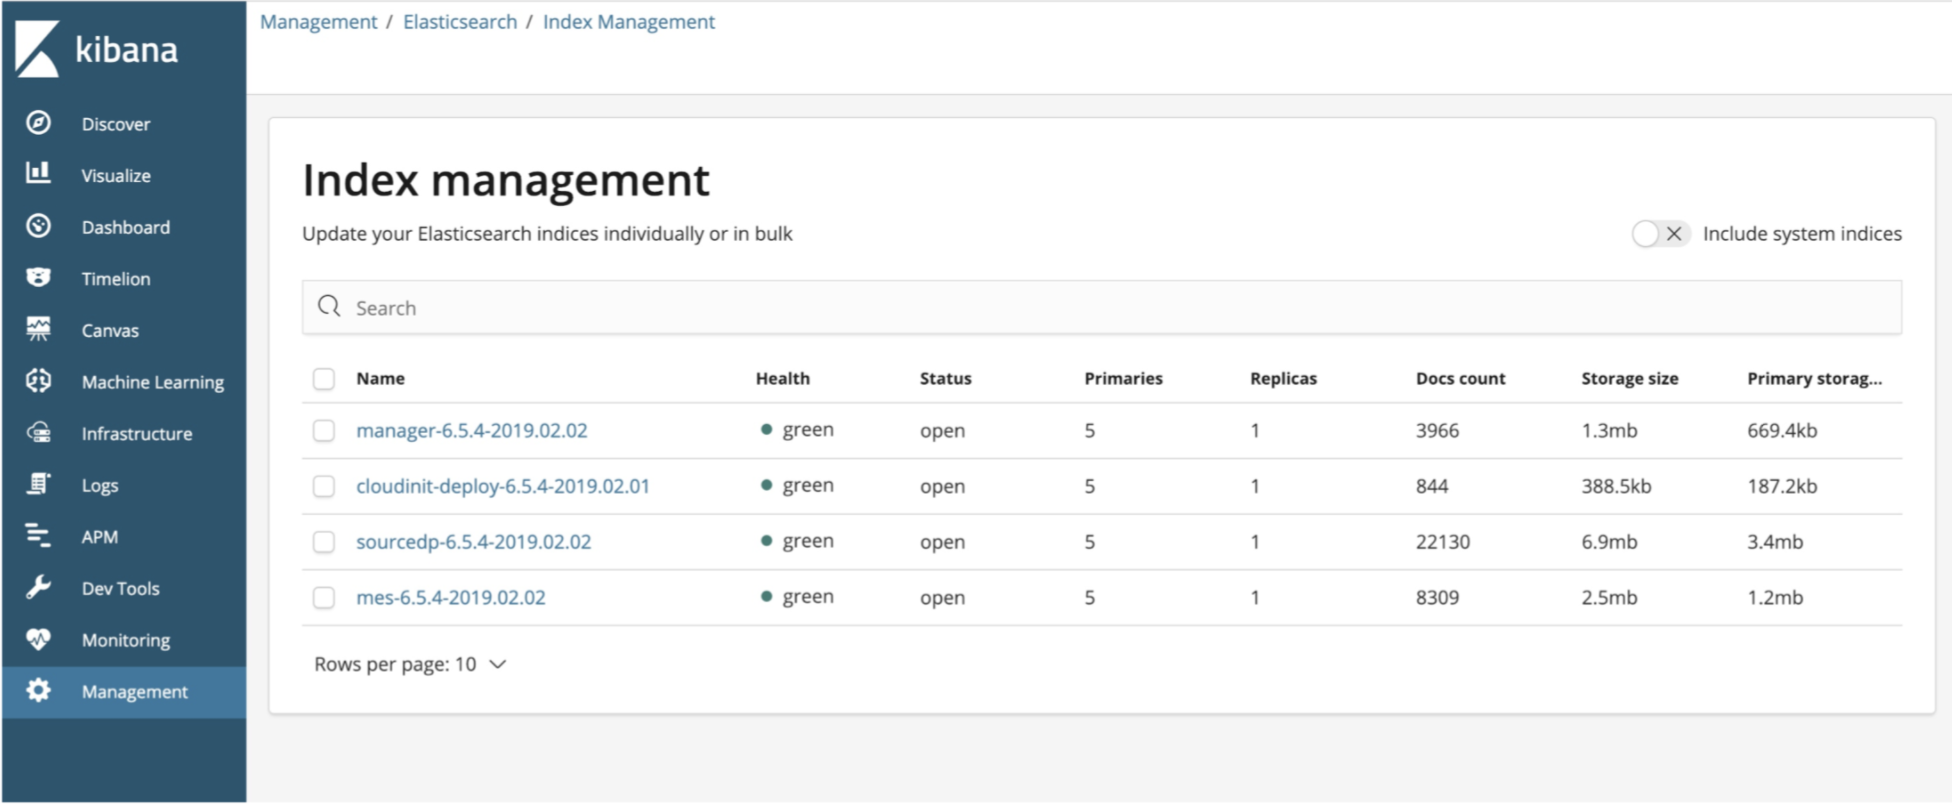
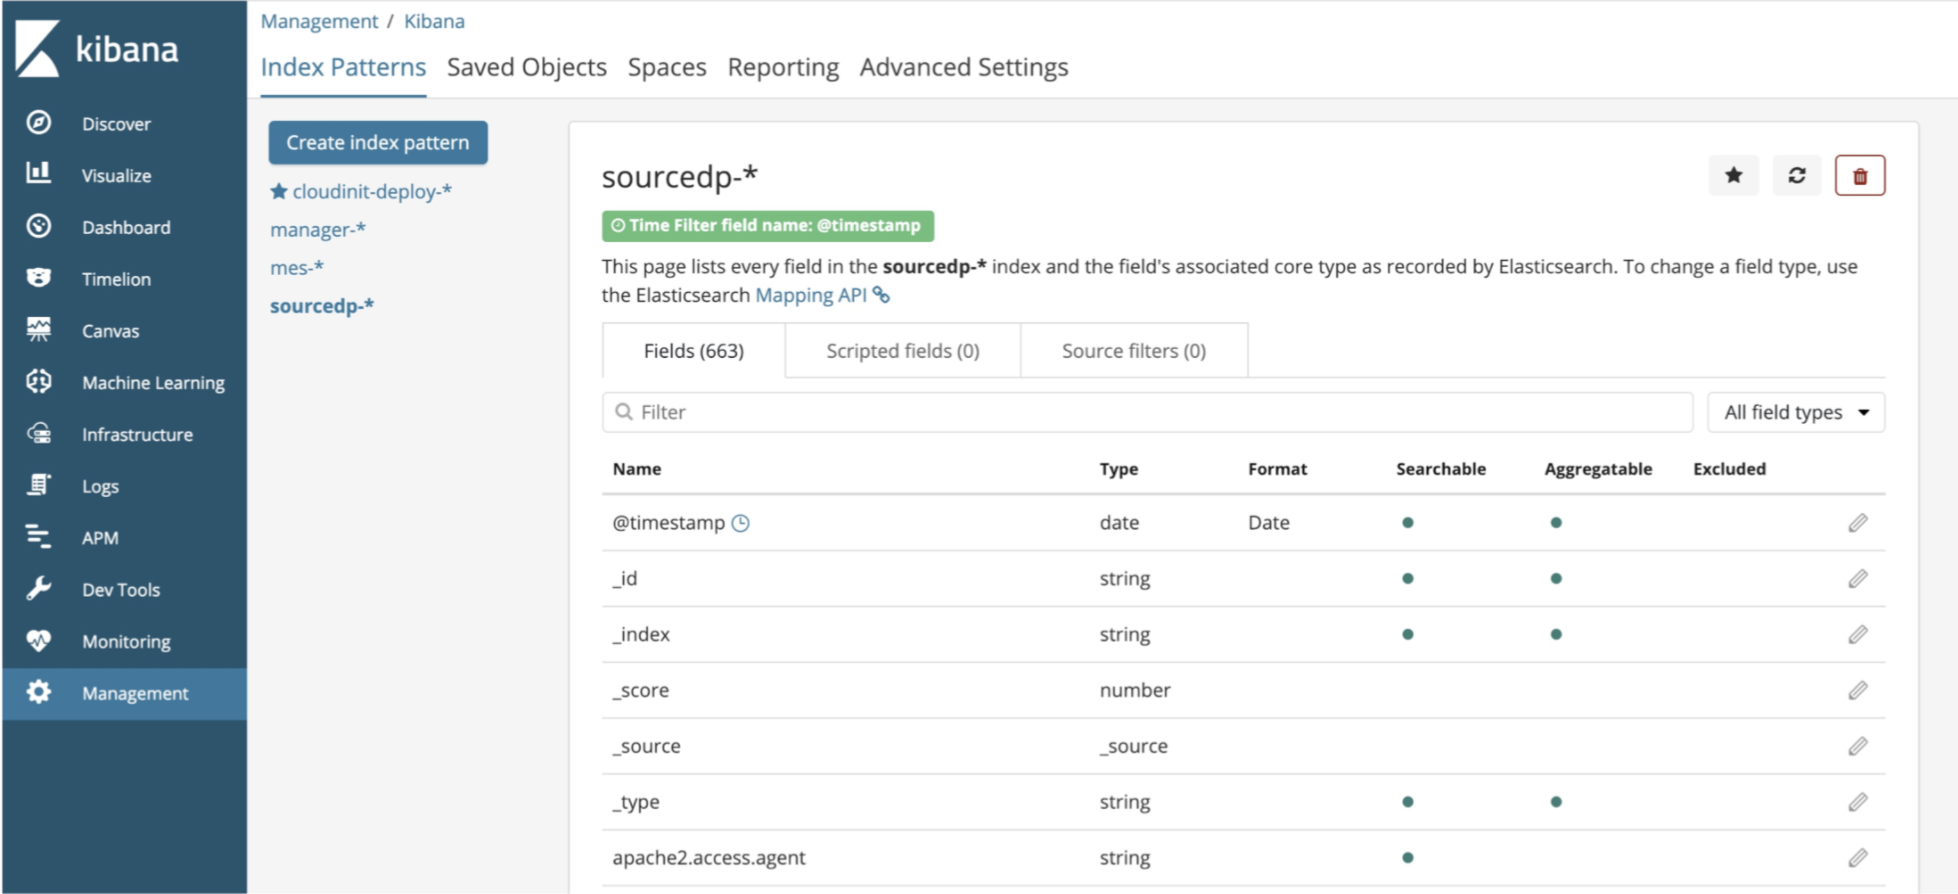
截图展示
ES集群状态


ELK平台占用资源分析
目前(2019-02-11 17:39)整体使用2G内存,200M空间。

内存使用
kibana,正常工作,使用的内存基本在1G以内,高负载运行使用内存不会超过2G

elasticsearch,正常工作,使用的内存基本在1G以内,高负载运行使用内存不会超过2G

filebeat,几十M内存,足够其工作。

Note: 如果有需求,可以对容器做强内存限制。

磁盘使用
所有重要数据都是持久化到本地的,其中最核心的日志数据是存放在swarm00这台机器的/data/elastic/elasticsearch1/data/目录上的,需要的磁盘空间与日志文件本身的大小,线性相关,基本上就是文件本身大小往上上浮个几M。
未分类
docker 容器日志集中 ELK + filebeat
https://www.cnblogs.com/jicki/p/5913622.html

https://medium.com/@bcoste/powerful-logging-with-docker-filebeat-and-elasticsearch-8ad021aecd87


开始使用Filebeat
https://www.cnblogs.com/cjsblog/p/9445792.html

ES系列十八、FileBeat发送日志到logstash、ES、多个output过滤配置
https://www.cnblogs.com/wangzhuxing/p/9678578.html

https://www.elastic.co/guide/en/logstash/6.5/advanced-pipeline.html